


Navigate to Olegnax > Instagram Pro : Posts to open Instagram posts list page.
On this page you can get/update and manage posts from Instagram.
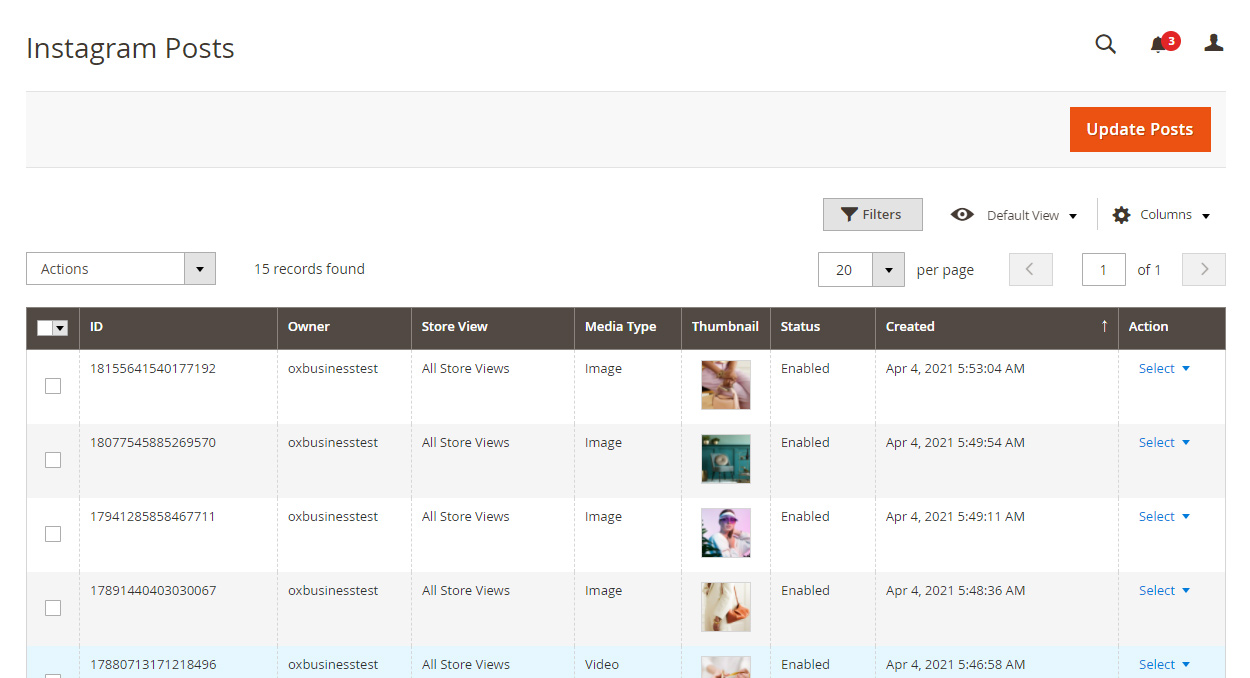
Get posts from Instagram
First of all, after you added your Instagram accounts, you need to download posts from Instagram to Magento so they appear on this page. To do this click Update Posts button in the top right corner of the page.
After that you should see a list of Instagram posts from all of the Instagram accounts that you’ve added.
You need to click Update Posts button each time, after you added a new posts to the Instagram. Or you can sync post from Instagram automatically by enabling Automatic Update in Olegnax > Instagram Pro : Settings. In this case Magento will check for new posts on Instagram each hour.
Filter Posts
Owner column shows from what Instagram account posts were downloaded, so you can Filter and sort posts by Instagram account (or other data).
Delete Posts
You can’t remove Instagram posts via Magento admin panel. If you delete post it will be removed from Magento database only and will appear again after you click Update posts.
We also do not remove posts from Magento database if they were removed on Instagram. Posts have options like hotspots and linked products which may require a lot of time to setup, so if you want to remove posts, you will have to do it manually. Posts can’t disappear from Magento during data sync with Instagram.
Post Page
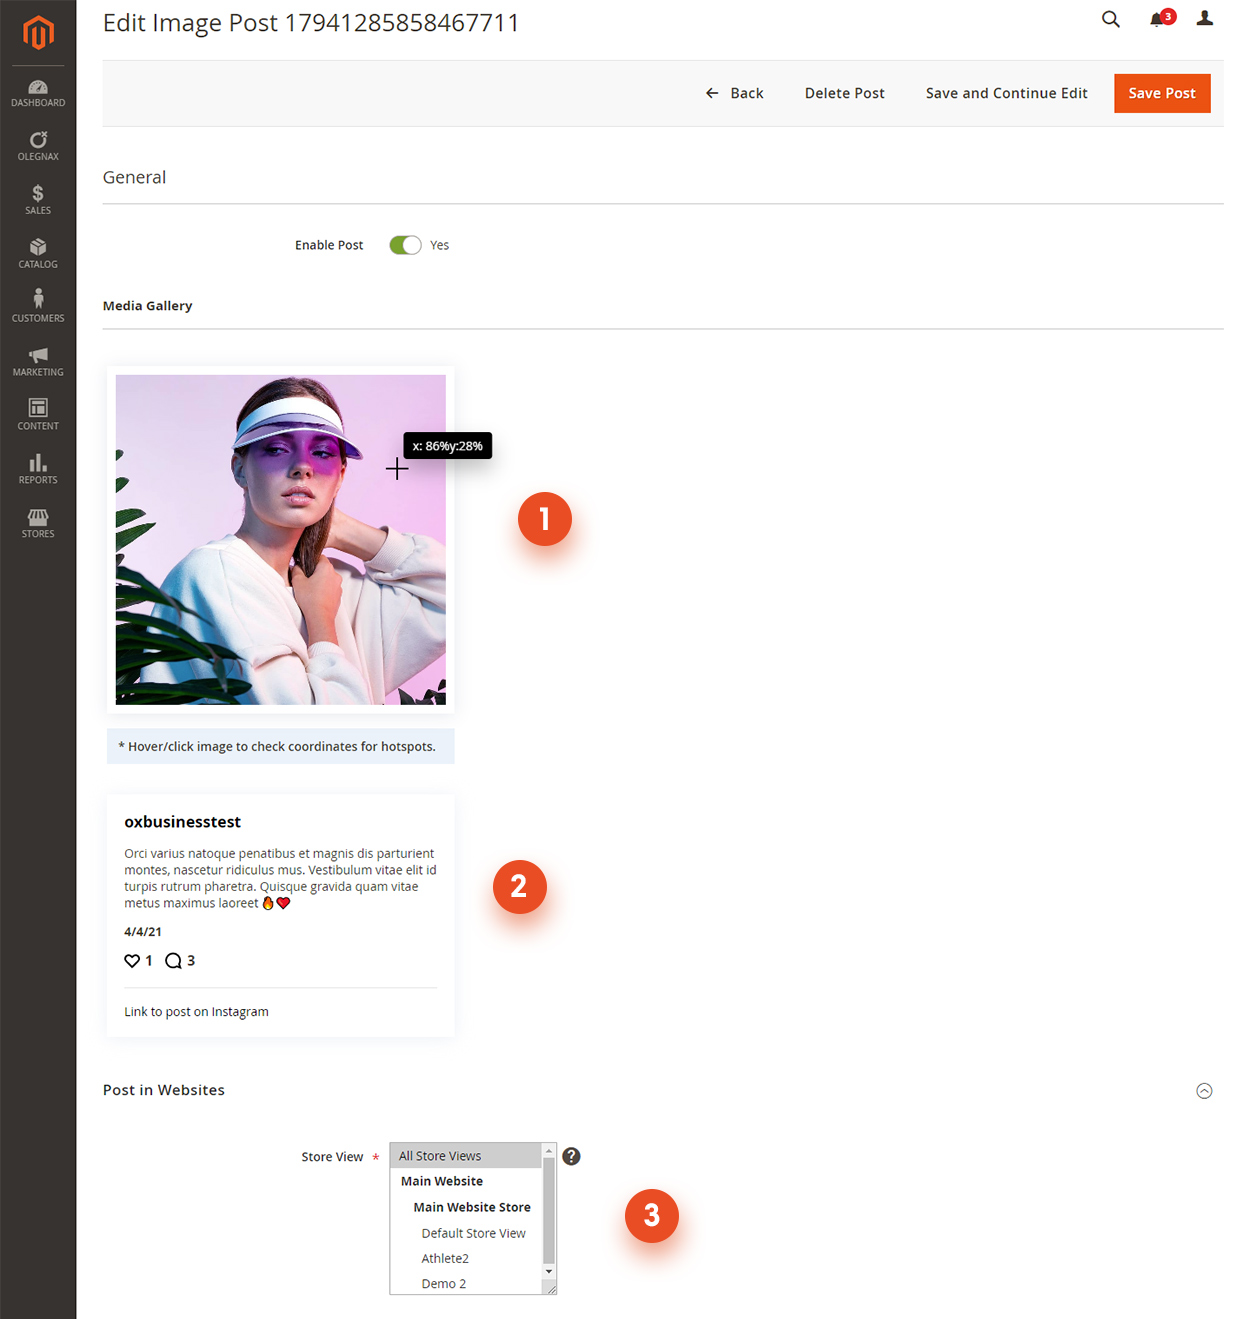
Click Select / Edit in Actions column on posts list page to view desired post.
On post page you can view Images/Video(1), description(2) and other post data from Instagram. Each post can be assigned to different store views(3).
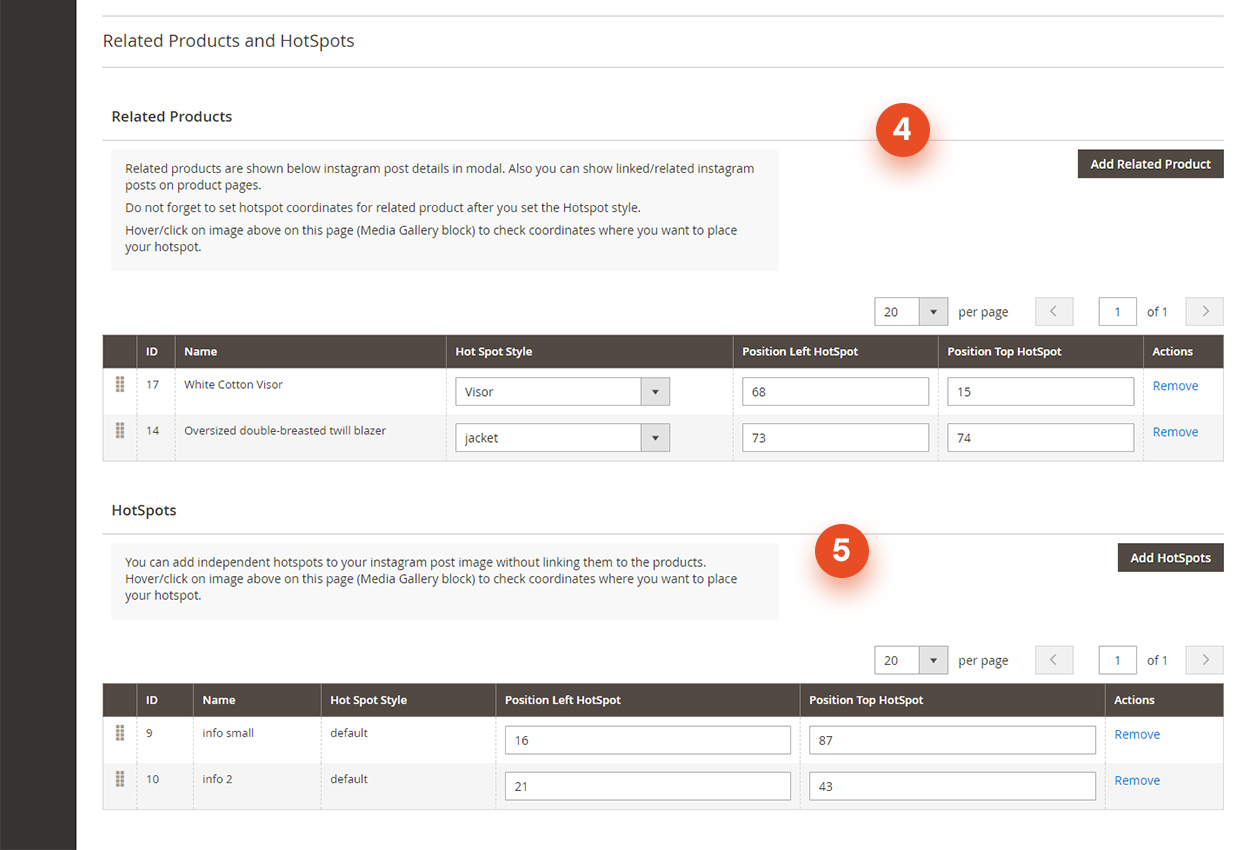
Related Products and Hotspots
On this page you can link/add related products to current post (4). Linked products will be displayed in Popup which appear when you click on post(image) in widget (if it is enabled).
Also you can display only linked Instagram posts on the product page.
To link product to a post click Add Related Product button and choose products. After that set coordinates to point to the product on image of your Instagram post(6). Hover and move your mouse over post image (1) to see coordinates. Coordinates are added in %.
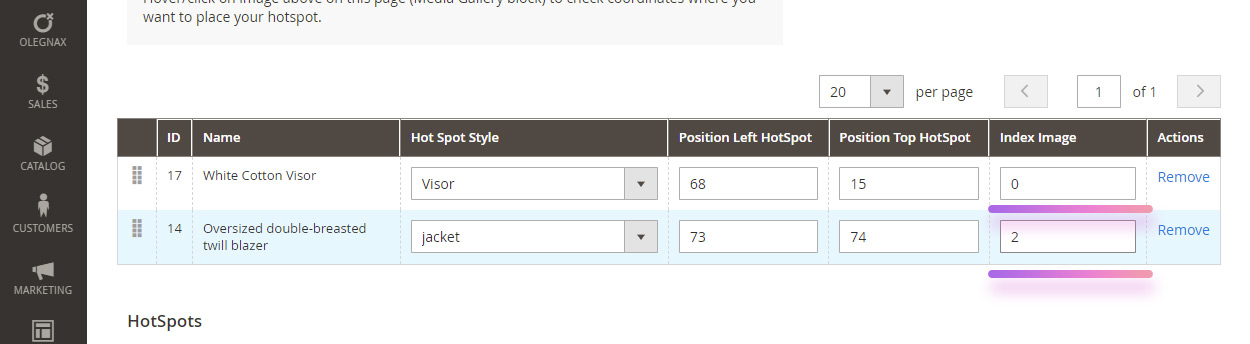
Show different hotspots for each slide in carousel
Use Index Image field when added hotspots for posts with multiple images. Default value is 0, means it will be displayed for all images. Set image number to show hotspots only for specific image in carousel. E.g. you have 3 images so the first image index is 1 and the last is 3.
Additionally you can choose a hotspot style. You can use predefined styles/shapes or create new hotspot for each product with custom styles and content in a tooltip. Default hotspots will show product name in a hotspot tooltip.
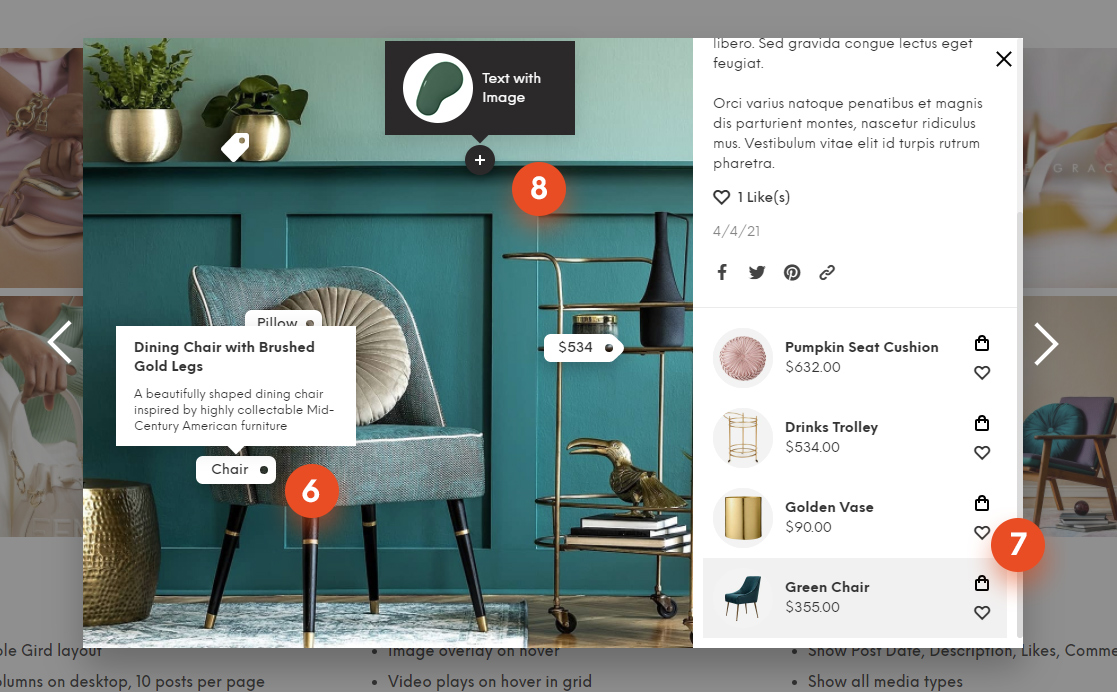
Products will be shown on the right side of the modal (7). You can choose from various layouts, show add to cart and wishlist buttons to allow purchase products directly from popup with Instagram post (See Olegnax > Instagram Pro: Settings > Modal Settings).
Product hotspots will highlight product on hover and vice versa (6,7). You can set highlight background and border colors. On image above it adds light grey background to the product when you hover relative hotspot.
Hotspots
You can use this section (5) to add hotspots which are not linked to the products. Use themto add some additional information to the image (e.g. fabric/paint colors (8)).
- First of all create new hotspot in Olegnax > Instagram Pro: Hot Spots which custom content and settings.
- After that click Add Hotspot on post page (5) and choose your hotspot.
- Set hotspot coordinates.
- Now you should see a hotspot with custom content in a tooltip which appears on hover (8). You can add images and html to hotspots tooltip content.

