


Extension Settings
You can find Olegnax Instagram Feed Pro extension settings in Olegnax menu on the left side, in your Magento 2 admin panel: Olegnax > Instagram Pro
General Settings
Settings in Olegnax > Instagram Pro: Settings are global, means they will be applied to all Olegnax Instagram Pro widgets. You can also change various settings for each widget as described in “Olegnax Instagram Feed Pro Widget” section below.
General / Enable – enable or completely disable Olegnax Google Map functionality.
Please note, that if you don’t want to use this extension then it is better to uninstall it: How to Uninstall Magento 2 Extension
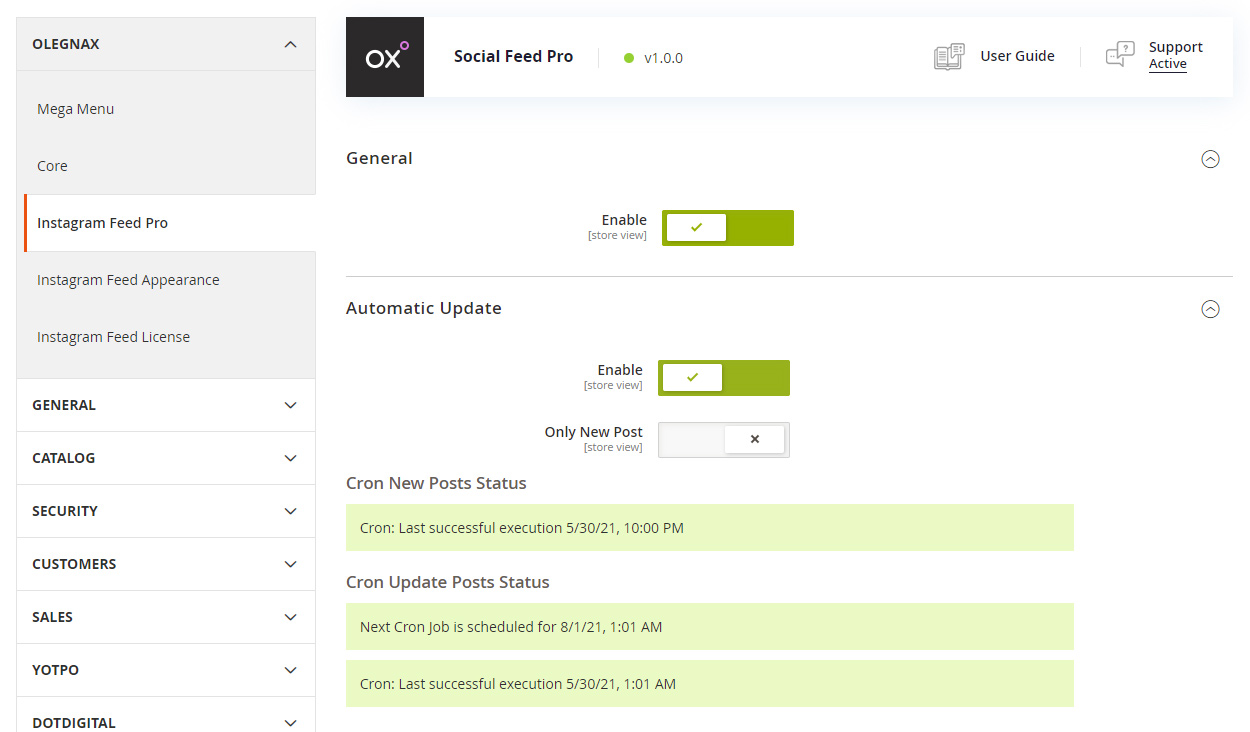
Automatic Update
Automatic update options allow to fetch posts and data (description, likes and comment counts) from Instagram automatically. New posts are fetched each hour and data update for existing posts once a day.
Enable – enable automatic posts update.
Only New Posts – enable to fetch new posts only without updating data for previously loaded posts.
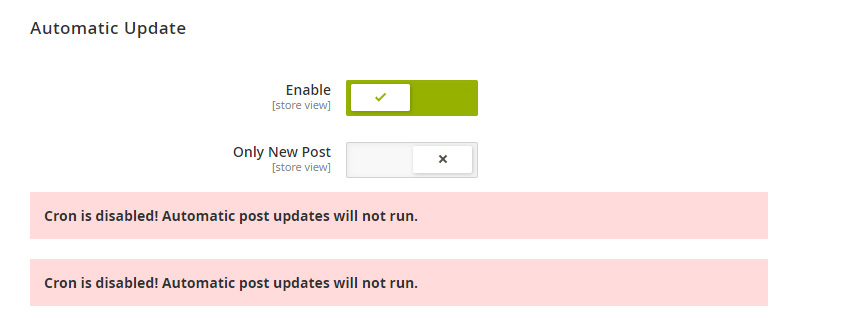
Important: These options require Magento Cron to be setup and running.
You can see Cron status below the options. Last successful execution means that posts where fetched by cron before.
If Magento 2 Cron is not set up/enabled you will see appropriate status. In this case posts can’t be fetched automatically.
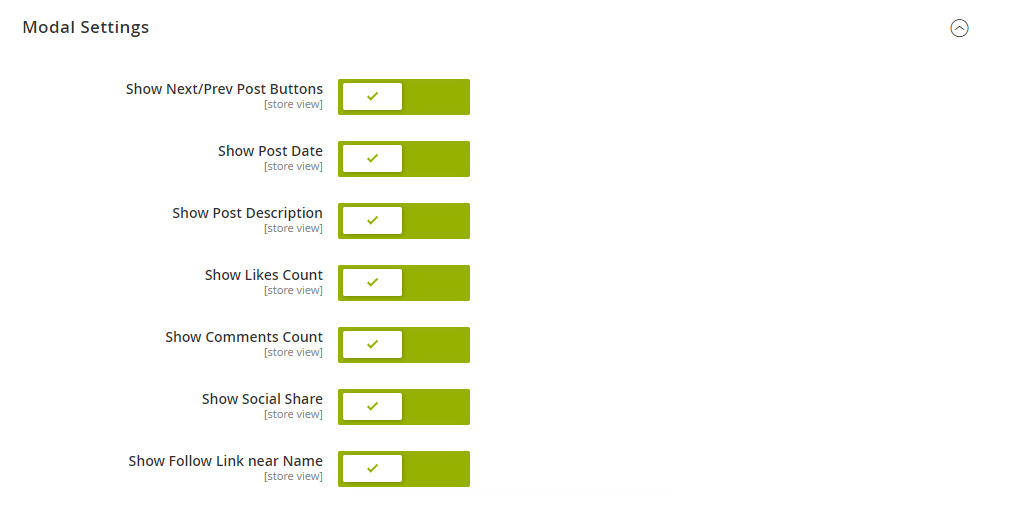
Modal Settings
Modal settings are related to the Popup which appear when you click on Instagram post in feed. This modal allows you to show Instagram post details, show hotspots and linked products. You can enable or disable modal in Olegnax – Instagram Feed Pro widget settings.
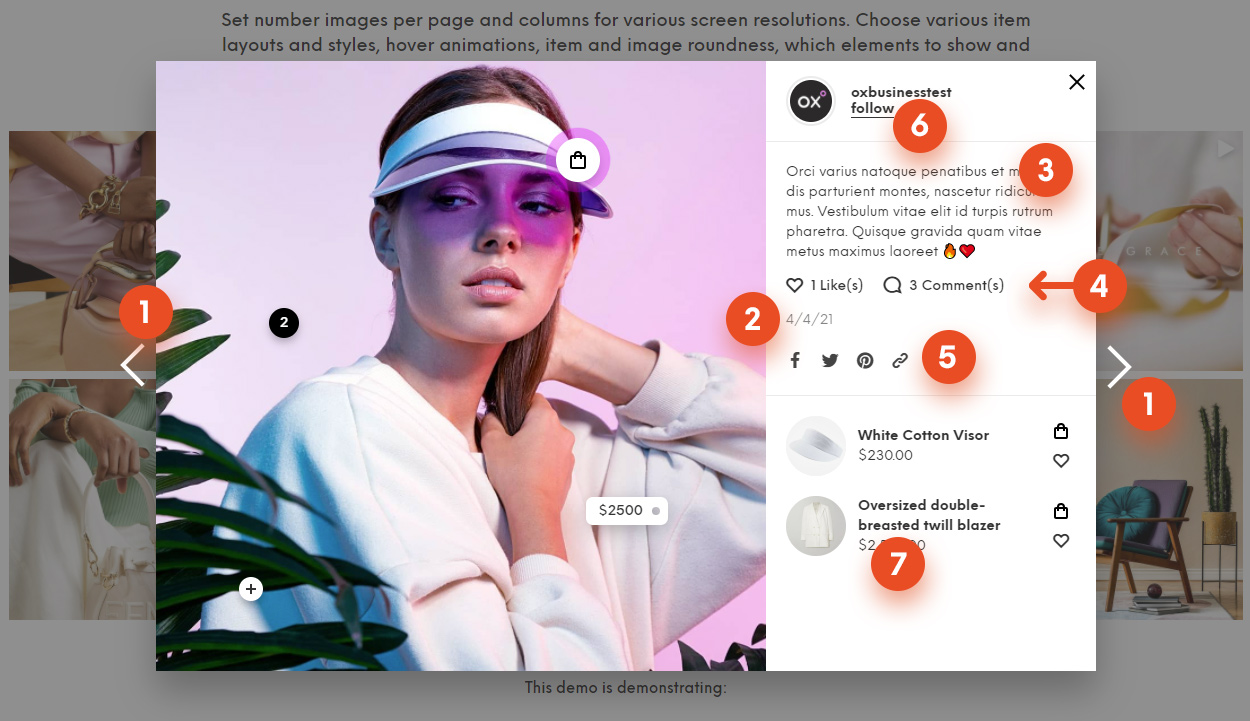
Picture: Example of Olegnax Instagram Feed Modal. 1 – Next/Prev post arrows. 2 – Post date. 3 – Post description. 4 – Likes and Comments count. 5 – Social Share. 6 – Account name with “Follow” link to Instagram. 7 – Linked/related products.
You show/hide each modal element using following settings:
Linked Products Layout – allows to choose layout for products in modal (See modal breakdown above (7)).
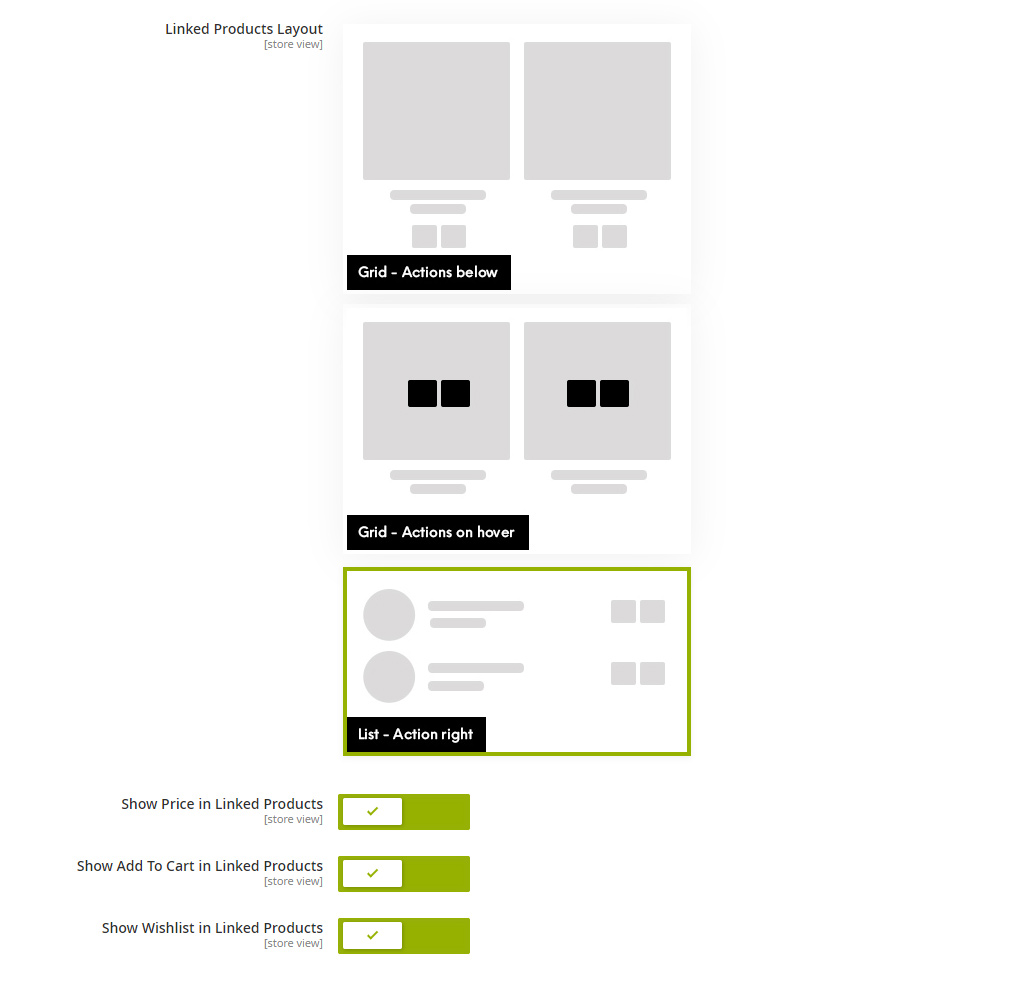
Additionally you can choose either to show price, add to cart and wishlist buttons for products in modal or not.
Product Page
Product page settings tab allows to add custom block to different locations on products. You can then add any content inside of this block, including Instagram widget. Widget or cms block can be added to product page via Content / Widget in Magento 2. Check this post to learn how to add widget in various locations in Magento 2. The problem is that Magento 2 has very limited amount of locations where you can add widget on product page. So we’ve added custom block options to allow you add widget in additional locations, inaccessible by Magento 2 default widget options.
Note that you can show only Instagram posts linked to the current product by enabling Show related posts only option in Olegnax Instagram Feed Pro widget.
Show Custom Block on Product Page – enable to add custom block on the product page.
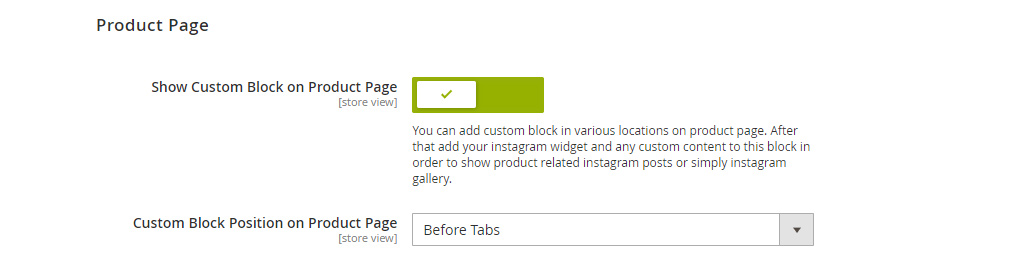
Custom Block Position on Product Page – you can add custom block to various predefined positions. Check image below for examples.
First block on example below added via Content / Widgets (default Magento 2 settings). It doesn’t require additional options to add widget there so we haven’t added it to the list.
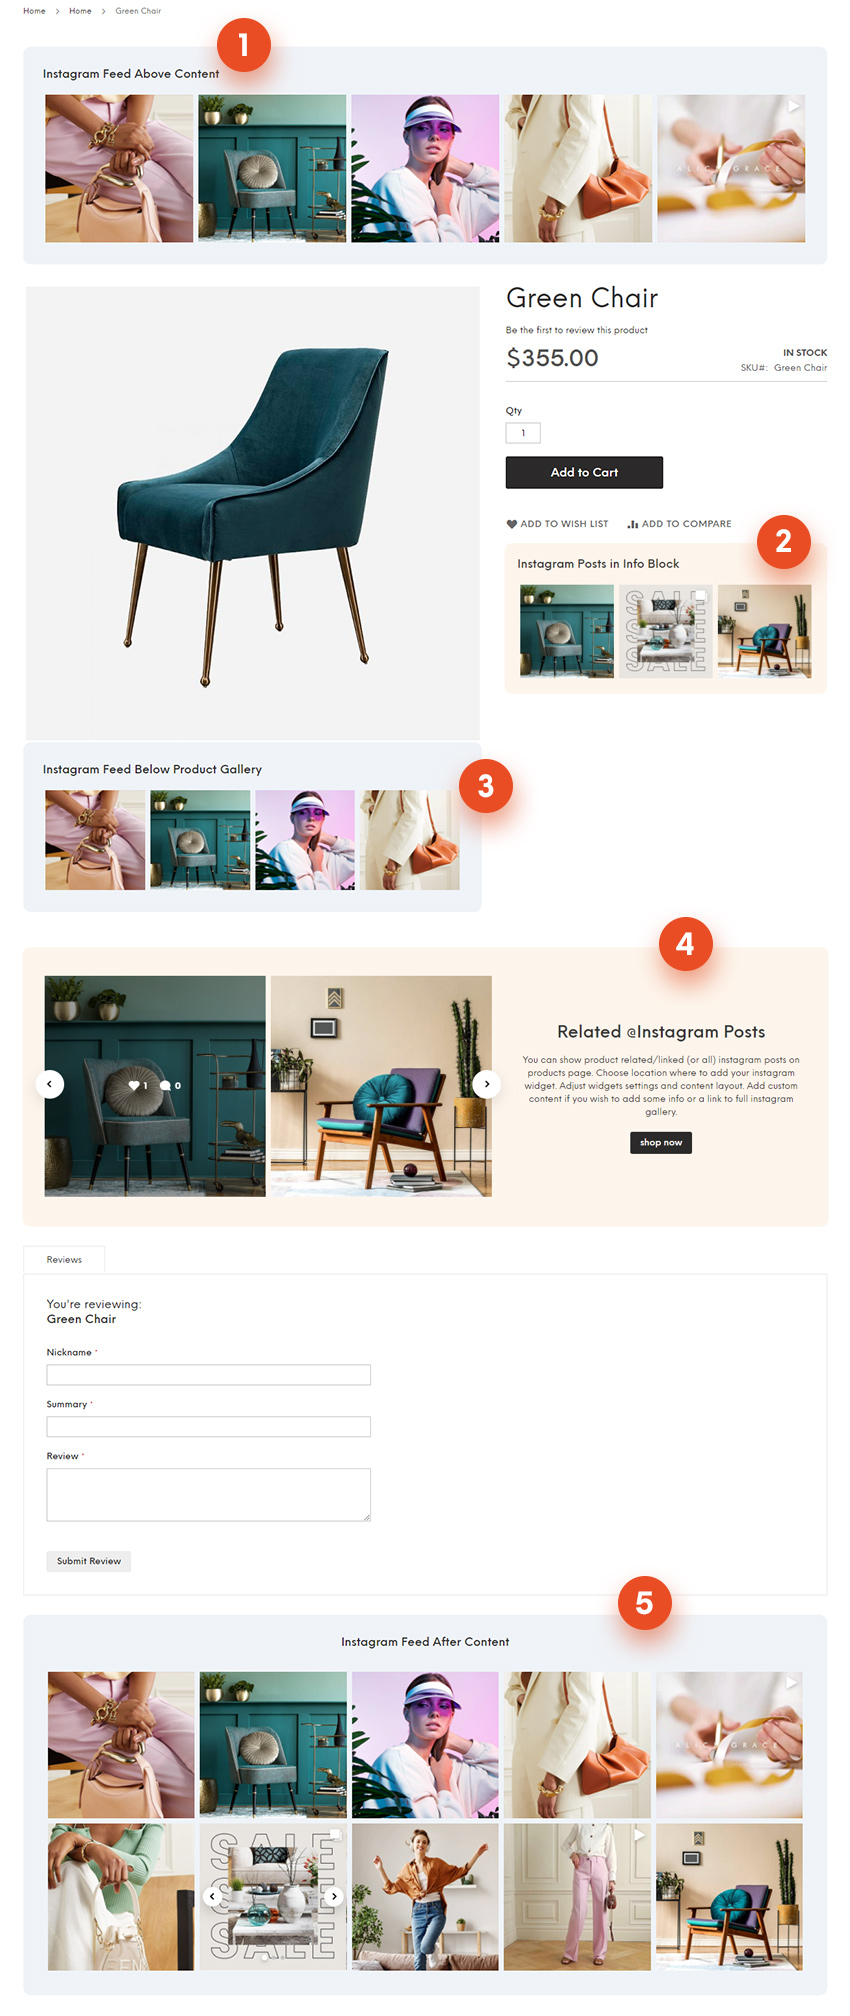
In Gallery Block– this will add custom block inside of the gallery block (below product images) as on example below (3).After Gallery block– will add it below the block which means after gallery and info blocks in default Luma theme. In current example it will be placed in (4) position but it may differs depending on the theme.In Info Block, after all– will add block to position (2) in our example.In Info Block, after description– will also add block to position (2) in our example but for example in Athlete 2 theme description is above add to cart. So it will be placed between the description and add to cart blocks in Athlete 2 Magento 2 Theme. So keep in mind that position may vary depending on the theme.After tabs– will add block right after tabs, position (5) in our example. Again, in Athlete 2 you can control tabs position.Before Tabs– position (4) in our example. But in Athlete 2 theme it will differ depending on the tabs position.In content before all– in our example we have only tabs in content, so it would be placed in position (4).In content after all– number (5) in our example since we only have tabs in content. If you will have other elements in content, they will be before this block (unless you repositioned them to be “after all” as well).
So just keep in mind that while some of the different options would place block in the same position in our example, you can have completely different results depending on your theme and extensions installed.
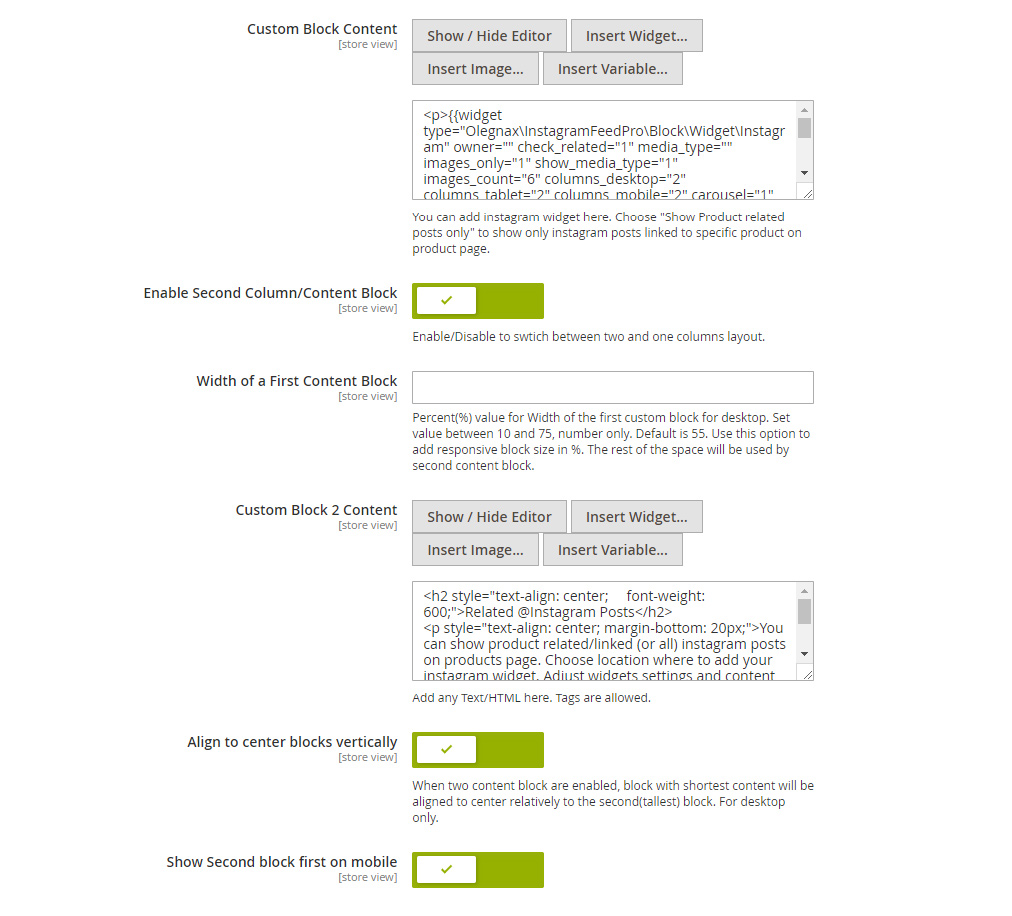
After we decided where exactly we want to show our custom block lets decide what will be inside of the block.
Custom block can have one or two content areas/columns.
Enable Second Column/Content Block – will enable additional content area and options for second column.
Width of a First Content Block – allows you to control width of the first column/content area. The second columns will take up the remaining space. Value is set in % but you only need to enter the number. For example 65 will mean that the first column(L) will take 65% of the width and the second one(R) 35%. If second column is disabled first block will take 100% width.
Custom Block Content and Custom Block 2 Content – are shown as (L) and (R) on image below. These are content areas where you can add any content including Olegnax Instagram Feed widget.

Align to center blocks vertically – will align content of the shortest block vertically to center. In our example second block is shorter.

Show Second block first on mobile – will show second content area before the first on small screen resolutions. As shown on image below. Otherwise it will be below the first content area.


