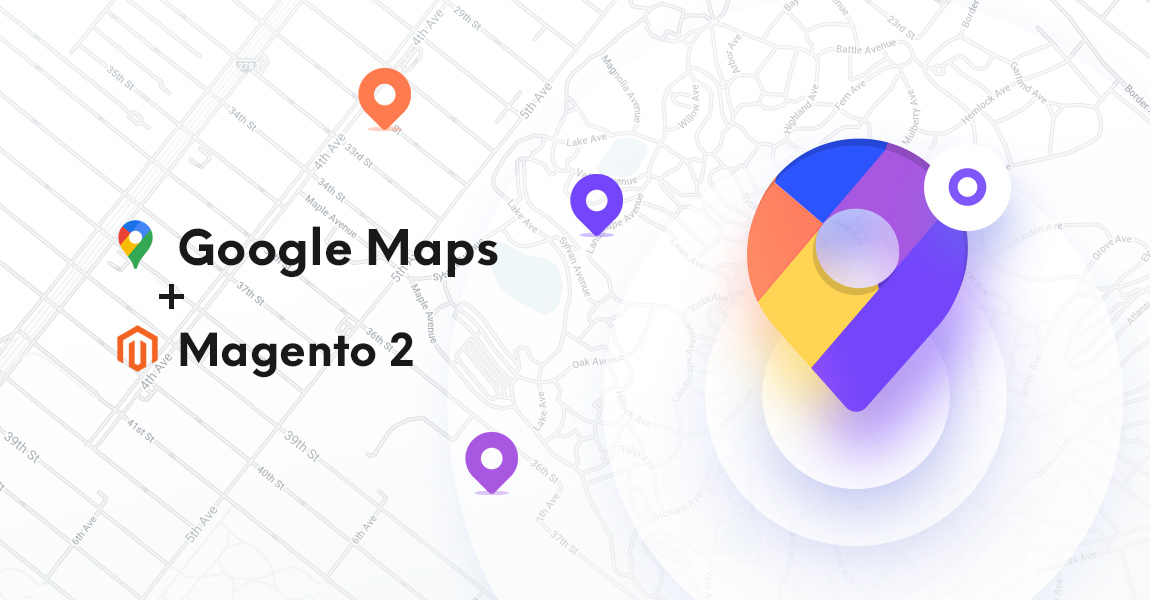
Do you want to add Google Map to Contact page in Magento 2?
In this article, we will show you how to easily add google map to contact page or any other place in Magento 2 two different methods.:
1. Add Google Map Manually using code (Html, CSS, JS)
2. Add Google Map in Magento 2 with multiple locations, using Free Extension
Get Google API key
No matter which method you choose, you need to get google map API key first. You can learn how to get google maps API key in this post.
How to add Google Map to Magento 2 Contact Page Manually
You can find detailed instruction with code examples on how to add map to your website in google maps official docs. Therefore, we will not go into details of google map code but will focus on adding it to Magento 2.
We suggest to make all edits in child theme instead of editing your theme files. Learn How To Create a Child Theme In Magento 2
In short: What we are going to do is create a new template file with google maps code there and add it as block element to contact page using xml (Common layout customization tasks). And we will use sample code from Adding a Google Map with a Marker to Your Website section of google maps documentation. Ok, let’s go.
First of all, create new .phtml file, call it somehow recognizable, lets say google_map.phtml and place it somewhere in your theme. We decided to place it in the contacts folder since we are adding it to the contact page (this is not a mandatory but simply easier to find it in future). So the full path will be as follow:
app\design\frontend\<Vendor>\<Theme>\Magento_Contact\templates
Replace <Vendor> and <Theme> with your theme and vendor names. E.g. for luma theme it will be:
app\design\frontend\Magento\luma\Magento_Contact\templates
and for Athlete2 theme:
app\design\frontend\Olegnax\athlete2\Magento_Contact\templates
Add sample code from google docs to google_map.phtml file. In our example we placed Html, JavaScript and CSS in a single file, you can of course separate it but there is really no point in doing that if you are going to add one simple map to only one page.
Here is what we have in our google_map.phtml file:
<?php
	$google_map_api_key	 = 'your code here';
	$google_map_latitude	 = -25.344;
	$google_map_longitude	 = 131.036;
	$google_map_zoom		 = 4;
?>
<style>
	/* Set the size of the div element that contains the map */
	#google-map {
	  height: 400px;
	  /* The height is 400 pixels */
	  width: 100%;
	  /* The width is the width of the web page */
	}
</style>
<div id="google-map" ></div>
<script>
	function initMap() {
		// The location of Uluru
		const uluru = { lat: <?= $google_map_latitude ?>, lng: <?= $google_map_longitude ?> };
		// The map, centered at Uluru
		const map = new google.maps.Map(
			document.getElementById( 'google-map' ), {
				zoom: <?= $google_map_zoom ?>,
				center: uluru
			});
		// The marker, positioned at Uluru
		const marker = new google.maps.Marker( {
			position: uluru,
			map: map,
		} );
	}
</script>
<!--Load the API from the specified URL
* The async attribute allows the browser to render the page while the API loads
* The key parameter will contain your own API key (which is not needed for this tutorial)
* The callback parameter executes the initMap() function
-->
<script async defer
	src="https://maps.googleapis.com/maps/api/js?key=<?= $google_map_api_key ?>&callback=initMap">
</script>
As you can see, we have replaced some values with variables for easier editing. So you can simply set values of these variables at the top of the file. Set your google map API key, zoom level and coordinates values. You can learn how to find google map coordinates here.
Add template with map to the contacts page
Create contact_index_index.xml file in Magento_Contact\layout folder of your theme, if you don’t have it yet.
Full path to the file is app\design\frontend\<Vendor>\<Theme>\Magento_Contact\layout. Again, replace <Vendor> and <Theme> with your theme and vendor names. So for luma theme it will be:
app\design\frontend\Magento\luma\Magento_Contact\layout
Add following content to it:
<?xml version="1.0"?>
<!--
/**
 * Copyright В© 2015 Magento. All rights reserved.
 * See COPYING.txt for license details.
 */
-->
<page xmlns:xsi="http://www.w3.org/2001/XMLSchema-instance" layout="1column" xsi:noNamespaceSchemaLocation="urn:magento:framework:View/Layout/etc/page_configuration.xsd">
    <body>
        <referenceContainer name="content">
            <block class="Magento\Framework\View\Element\Template" name="google_map" template="Magento_Contact::google_map.phtml" before="contactForm" />
        </referenceContainer>
    </body>
</page>
In our example we’ve added our template in container with name "content" and placed it before contact form (before="contactForm") but you can change these values and place it after form or in another container. For more details, please check Magento 2 official docs: Common layout customization tasks
That’s all.
Flush cache and you should be able to see map on contact page now.
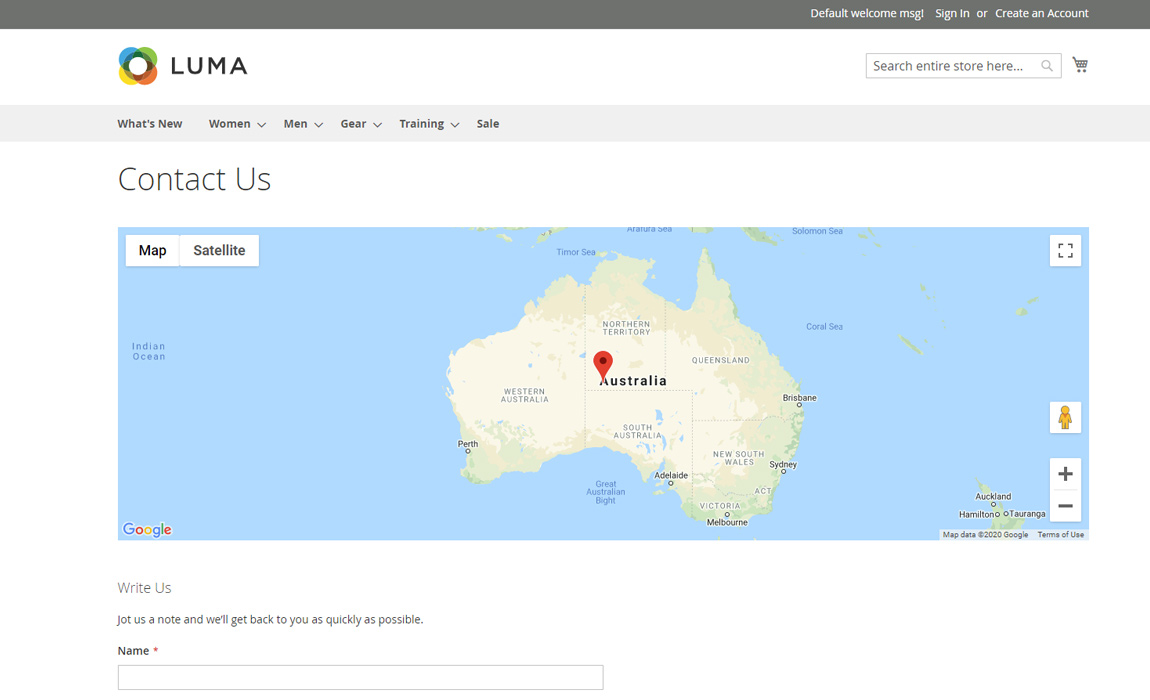
You can continue to explore Google Maps documentation and extend script in our google_map.phtml template to add more markers, change map settings, style, etc. Or you can simply use free google maps extension for Magento 2 as described below.
Adding Google Map in Magento 2 with multiple locations, using Free Extension
First, you need to download and install the Google Maps Widget For Magento 2 (and Olegnax Core extension if haven’t installed it yet). For more details, you can follow our guide on how to install a Magento 2 extension.
Required information:
Module Name: Olegnax_GoogleMap
Module Path: app/code/Olegnax/GoogleMap
Quick installation guide:
- Install Olegnax Core module if it is not installed.
- Copy Olegnax GoogleMap extension files to the root of your Magento folder.
- Set correct files owner and permissions.
- Log in to your server with SSH, go to Magento 2 folder and run following commands:
php bin/magento setup:upgrade
php bin/magento setup:di:compile
php bin/magento setup:static-content:deploy
That’s it. Now your extension should be installed and enabled.
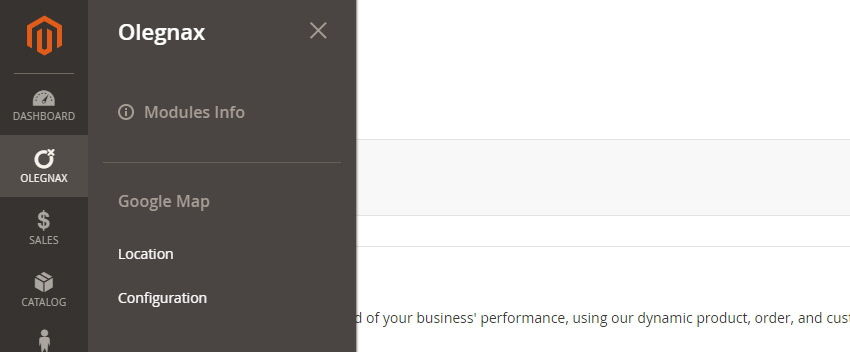
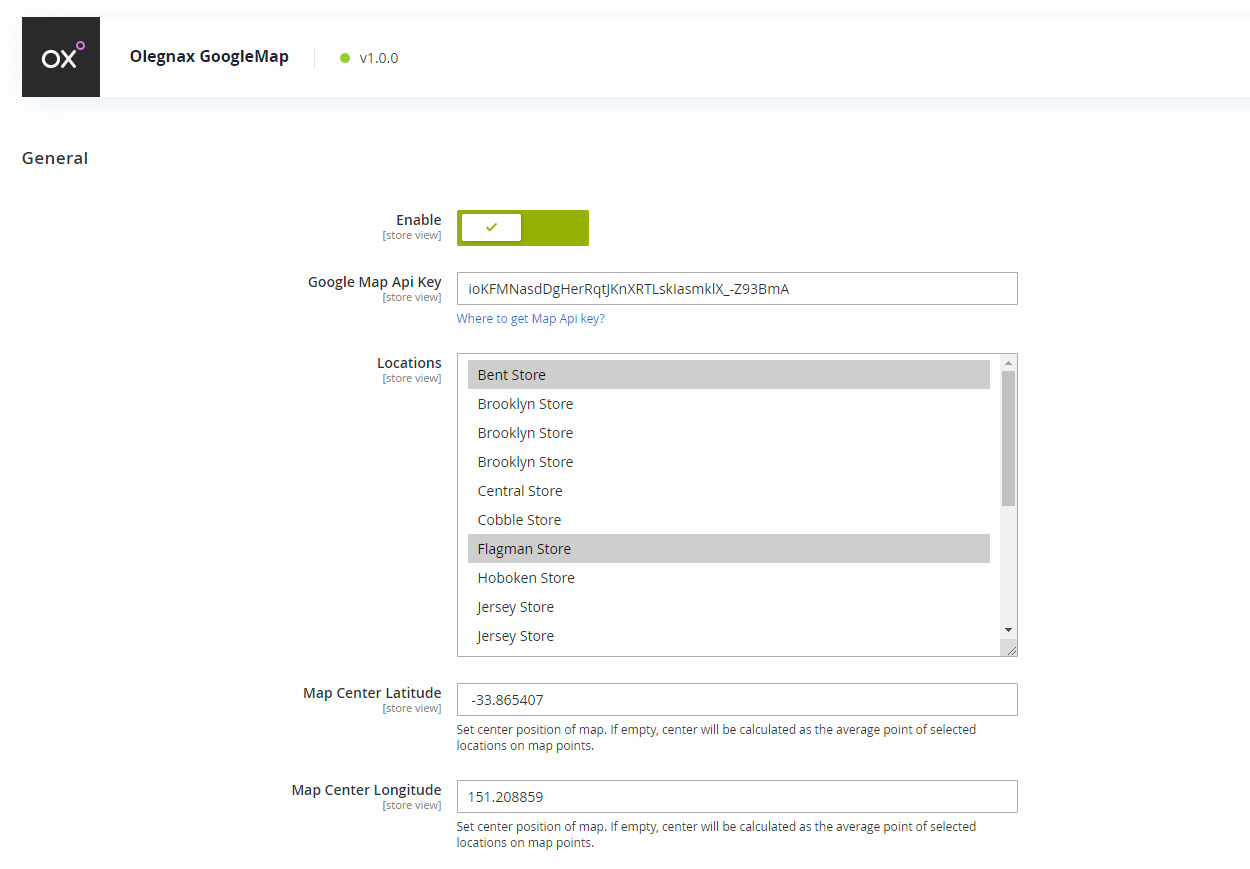
Visit Olegnax > Google Map > Configuration in Magento admin panel and add your Google Map Api Key, click save. You can also set other settings here if you are going to add map with the same settings or only one map.
Add locations to google map
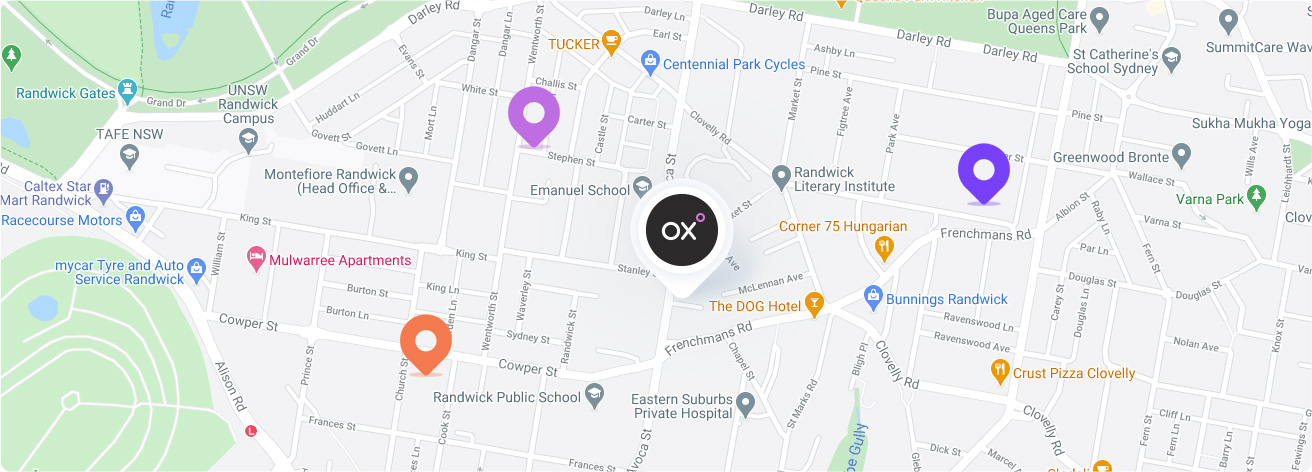
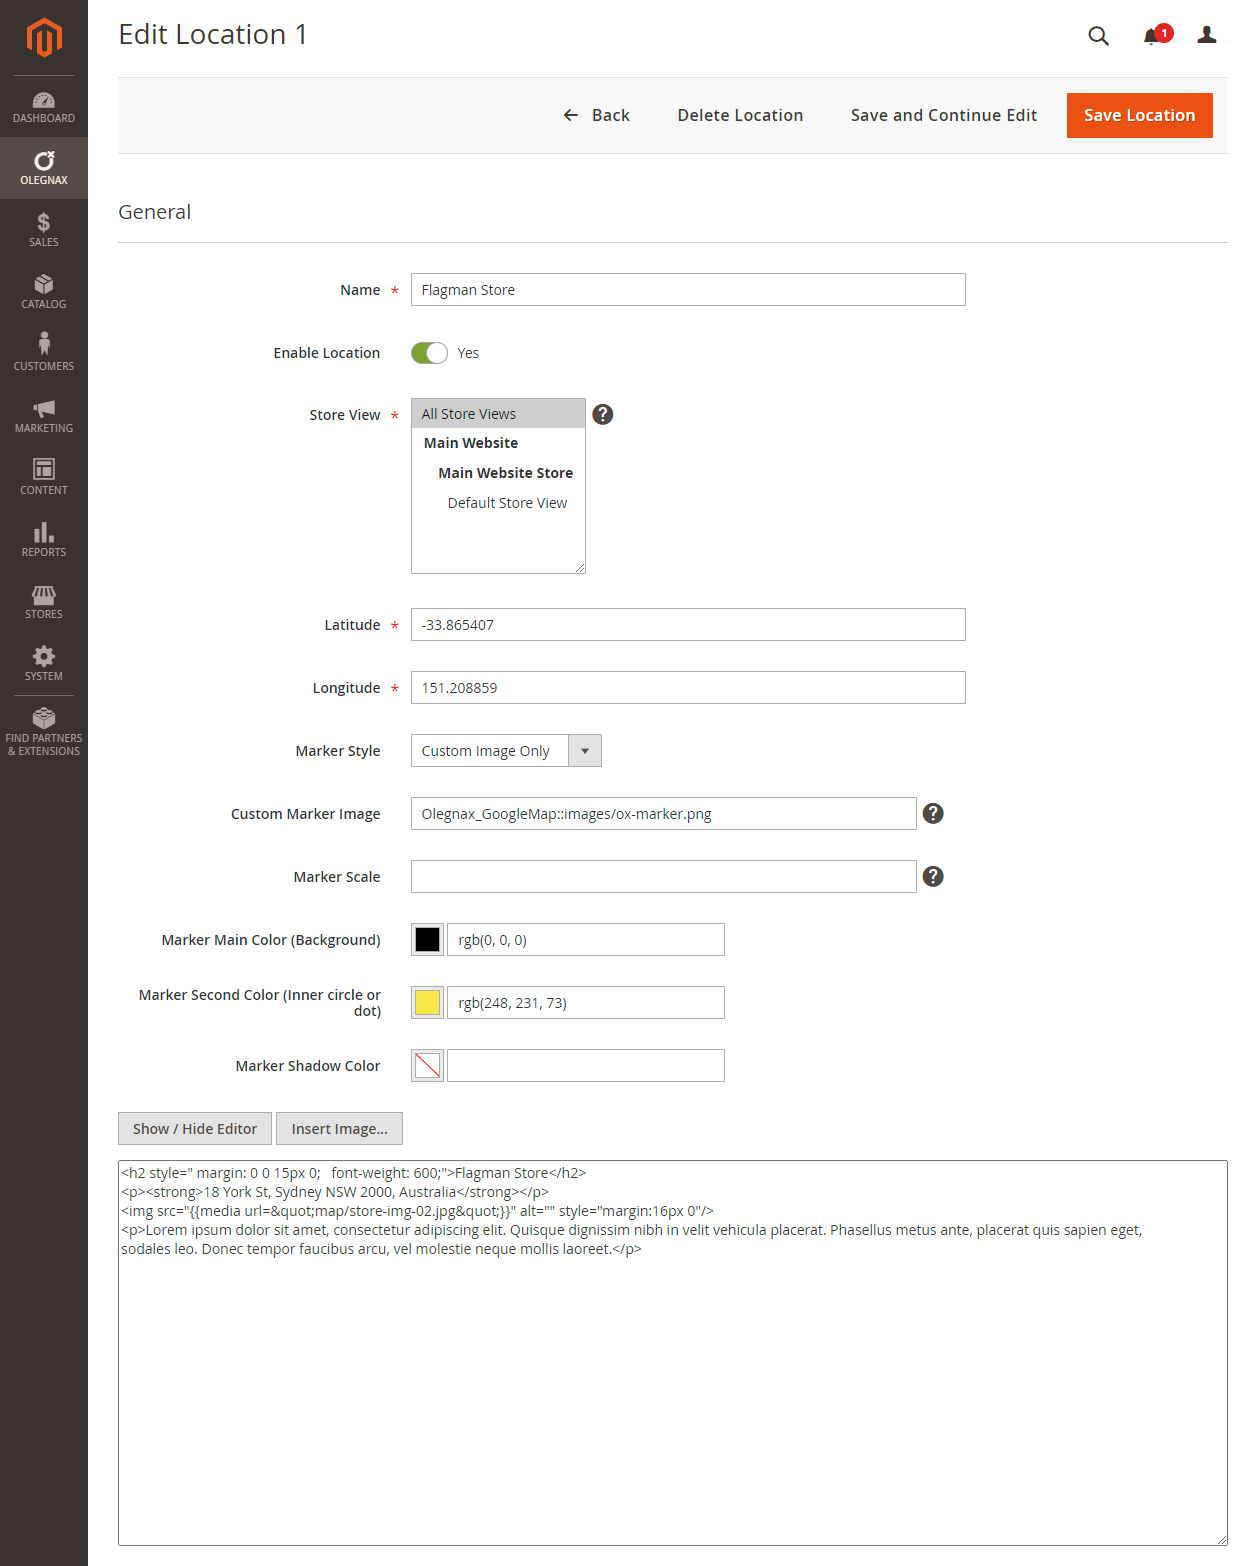
After that, you’ll need to go to Olegnax > Google Map > Location, click Add new Location and add your map coordinates (How to Find Google Maps Latitude and Longitude). You can also choose marker style or upload your custom image and add content for popup which appear when you click on marker. You can create as many locations as you need with different marker styles.
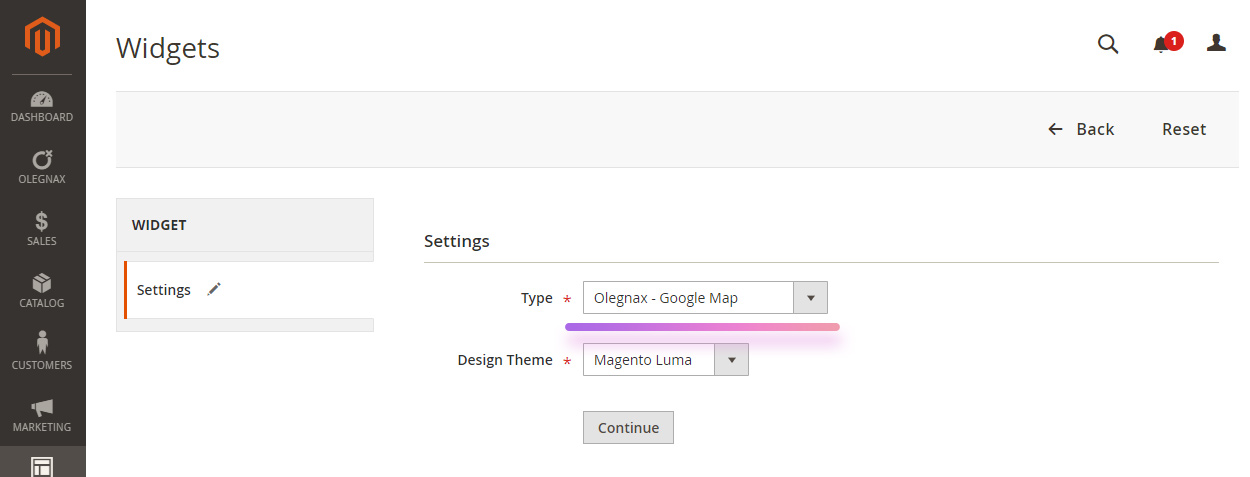
Now let’s add our map to contact page using widget. Go to Content > Widgets and choose type: Olegnax – GoogleMap, installed theme and click Continue.
On the first screen we can choose where to show our widget in Layout Updates block. Click Add Layout Update(1) and choose(2):
- Display on: Specified Page
- Page: Contact Us Form
- Container: After Page Header (or other container depending on where exactly you want to place map on contact page)
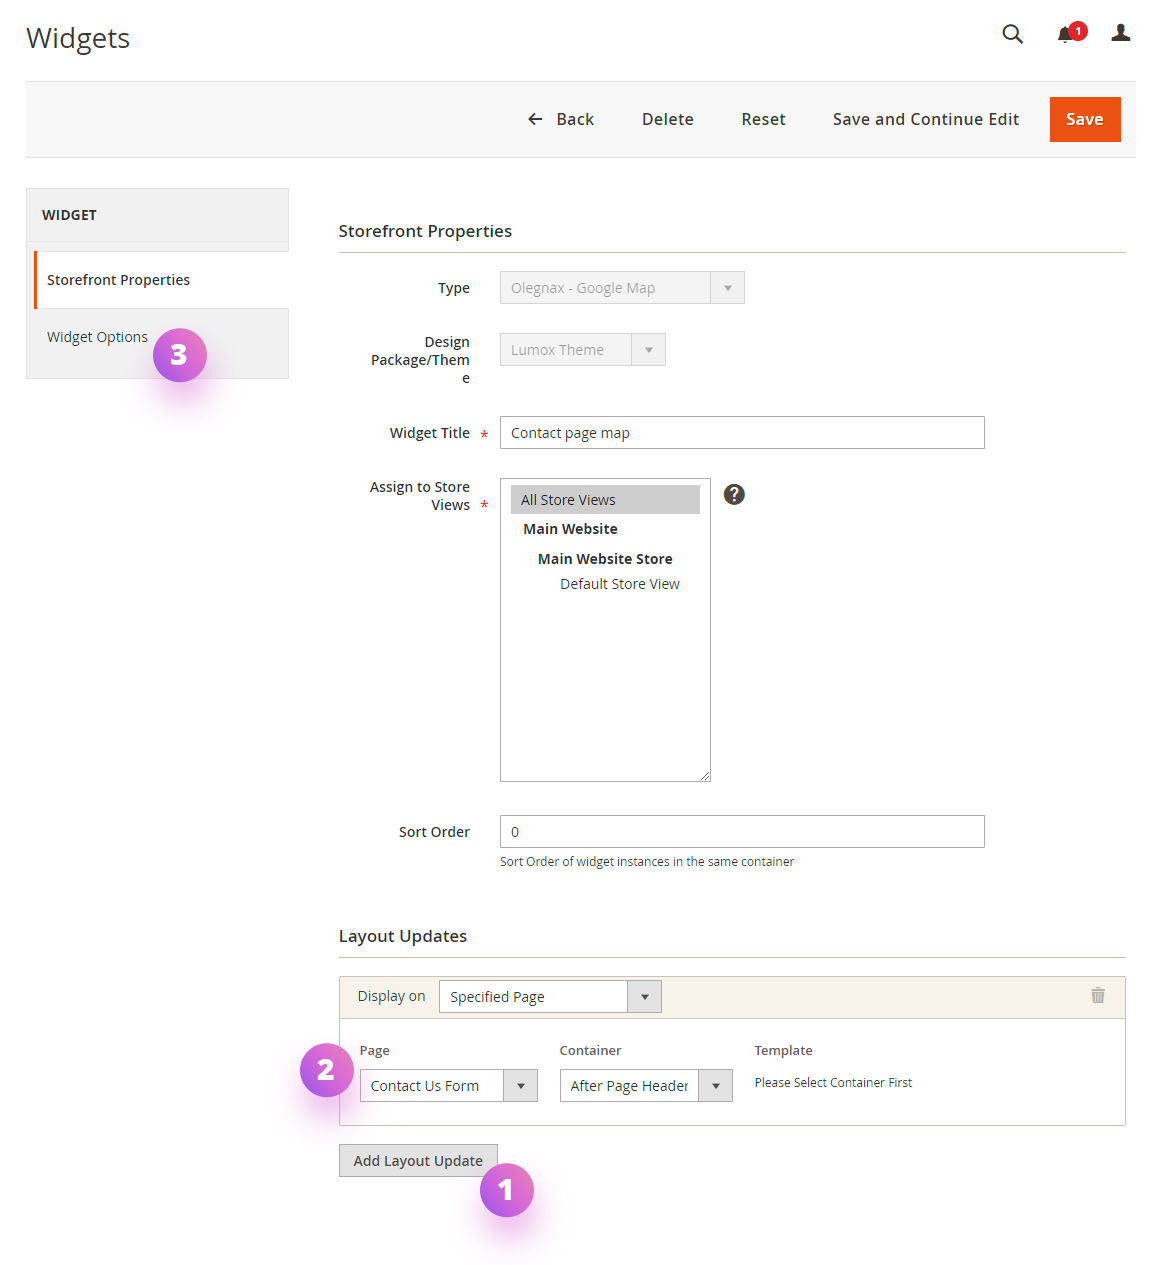
Finally switch to Widget Options(3) Tab on the left. Here we need to choose locations that we created earlier and set map height. Also we can choose map type, zoom level, adjust map center and more.
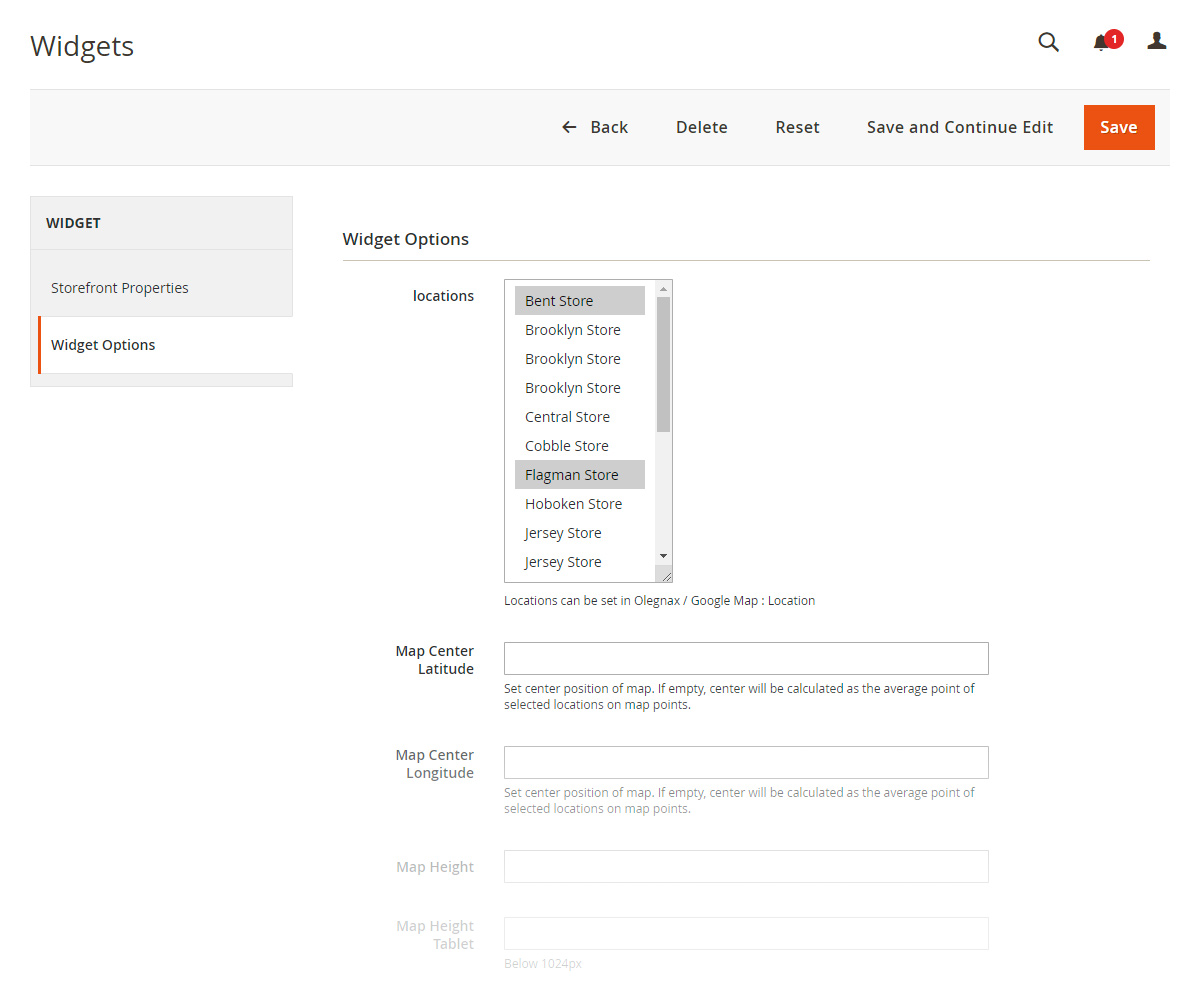
If you have single location map will use it as center but if you have multiple locations map will calculate middle position as center. You can set specific center coordinates e.g. if you wish add more attention to some locations.
That’s all. You can add map to any other page and containers in Magento 2 the same way and also set different settings and locations for each map.
As you can see, you can easily add google maps in different places in Magento 2 store, manage map locations and other settings using Google Maps Widget for Magento 2. It is also multistore and translation ready.
And of course, it is fully compatible with Athlete2 – Strong Magento 2 Theme
We hope this article helped you to learn how to add Google Map to Contact page in Magento 2.