


WPBakery Page Builder
Retro theme requires WPBakery Page Builder plugin to add shortcodes functionality and allow to build beautiful content.
If you are not familiar with this plugin then check official Documentation for instructions and Video Tutorials
You don’t need to purchase WPBakery Page Builder plugin, it is already bundled with the theme. It will be installed automatically by theme setup wizard.
You can however download 3rd party plugins bundled with the theme from My Account / Downloads section on olegnax.com website and install it manually.
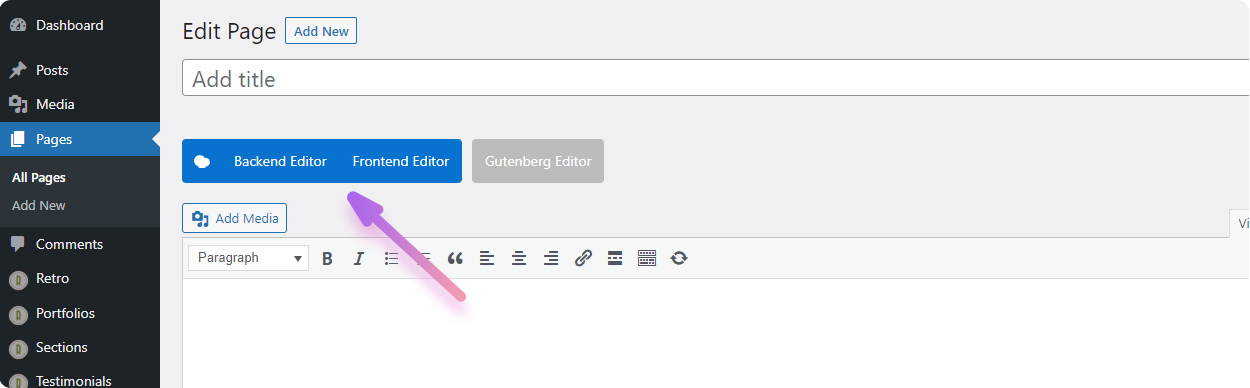
How to switch to page builder mode
When you open to edit a page/post you should see a blue button at the top of the page “WPBakery Page Builder” (5). Click on it to switch to page builder.

If you don’t see this button then 1. Make sure that WPBakery Page Builder plugin is installed and enabled (Plugins / Installed Plugins). 2. Make sure that page builder is enabled for page/post type that you are trying to edit.
After that click on “Backend Editor” Of “Frontend Editor” buttons in order to start editing the content using a page builder.
Starting Version 7.0 of WPBakery Page Builder you also need to choose a layout before you can start editing content. Choose “Theme Layout“.
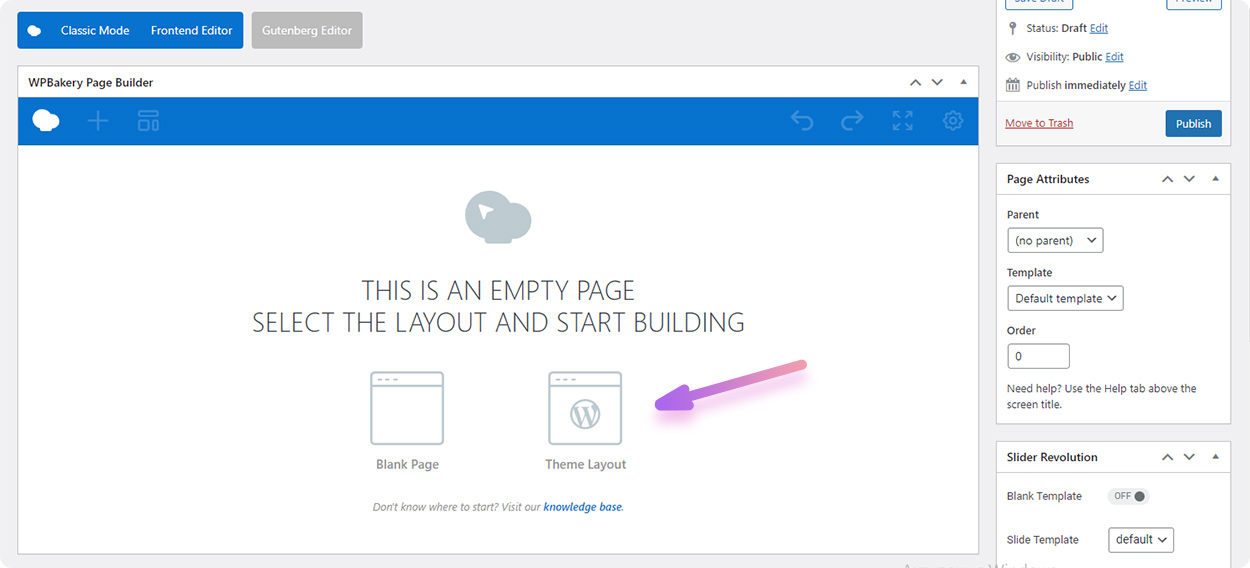
In case you’ve selected “Blank Page” template instead of a “Theme Layout”, then click on cogwheel (2) on the top right corner to switch it.
Now you can start adding elements (shortcodes) to the page by clicking on plus icon or “Add Element” button.

Retro Settings in Page Builder blocks
You can find additiona options added by retro theme in standard page builder blocks such as row, columns, text block, etc. Below you can learn where to find and use these settings.
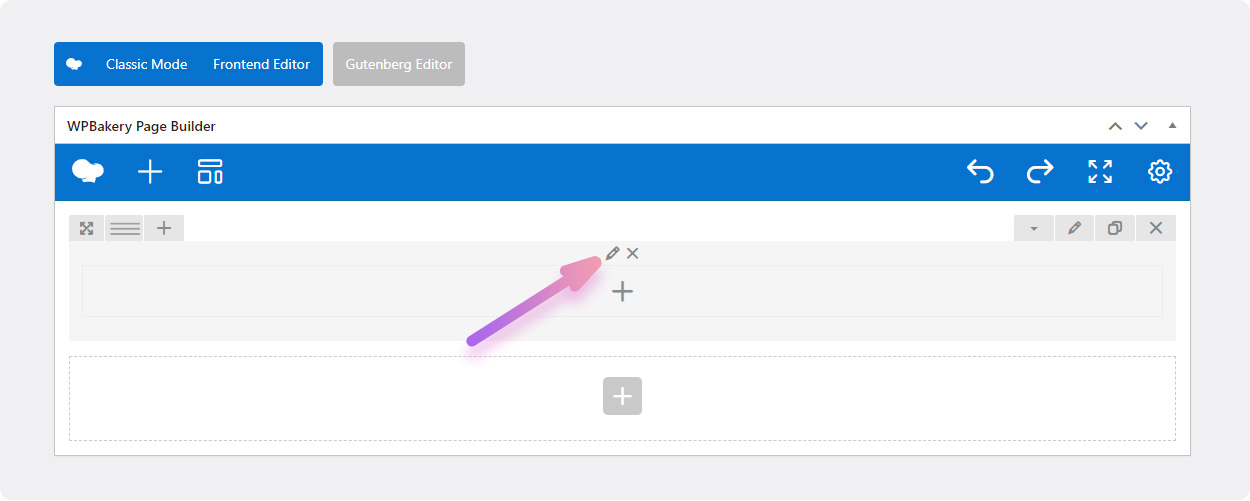
Text block theme options
To open theme options for the Text block:
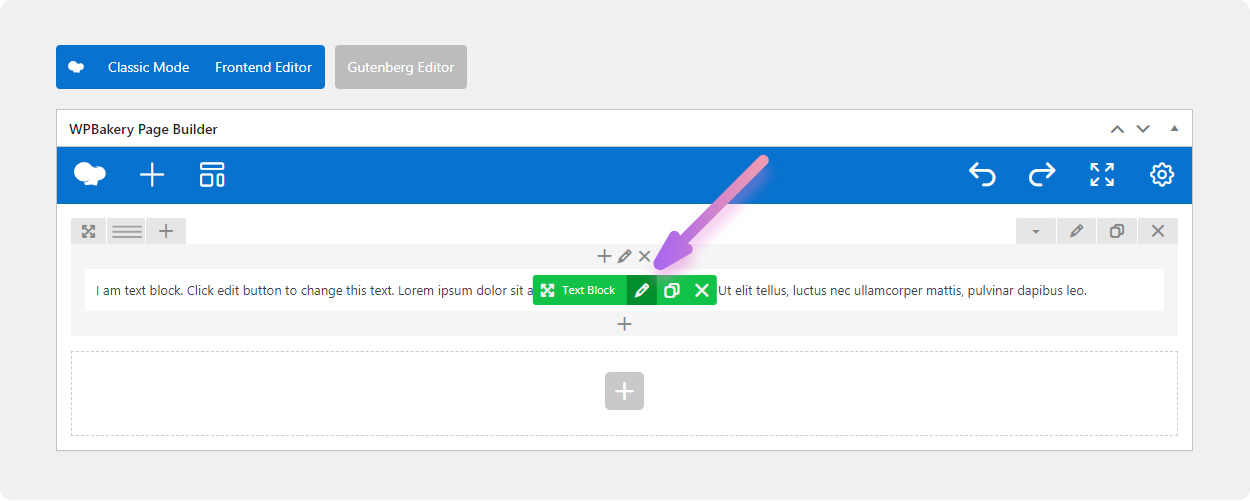
1. Move mouse over the text block so the green bar appear
2. Then click on pencil icon to open text block settings
3. After that switch to the “Theme Options” tab.
“Max width” options allows you to limit the width of a text block. You need to set value and units, e.g.: 500px or 50%.
“Max width Align” option allows you change the position/alignment of a block content after it width was resized. If centered then extra space will equal on left and right sides. Note that this will not make text centered, only the block itself.
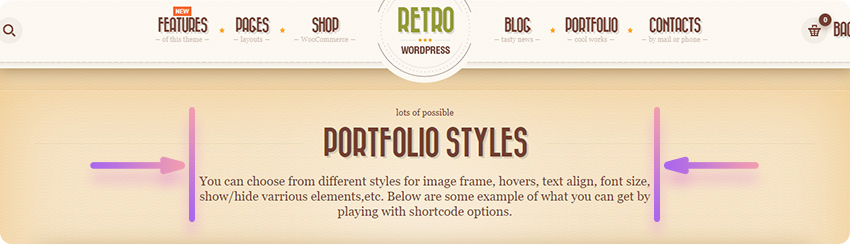
You can check an example of a text block (below the “Portfolio Styles” title) with max-width and centered on the image below.
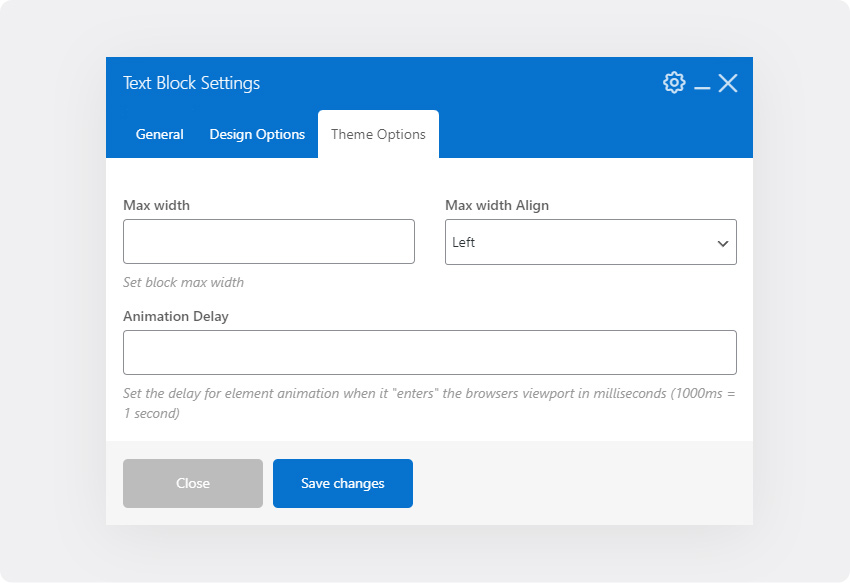
Animation Delay input allows you to add a delay to the text block animation by a specified duration in milliseconds. E.g. “500” would delay the animation by 500ms, or 0.5 seconds. Enter the delay in milliseconds without unit value, number only. This option is useful for creating staggered animations so the blocks do not appear at the same time when they became visible.
Column Theme Options
To open column settings click on the pencil icon in the top center of a column block.
Column has additional Alignment options for content.
It helps to align all content elements in bulk and can be really a time saver when you have a lot of elements in column. So you don’t need to set alignment for each block and text inside of the column. Additionally it allows you to control elements alignment on different screen resolutions.
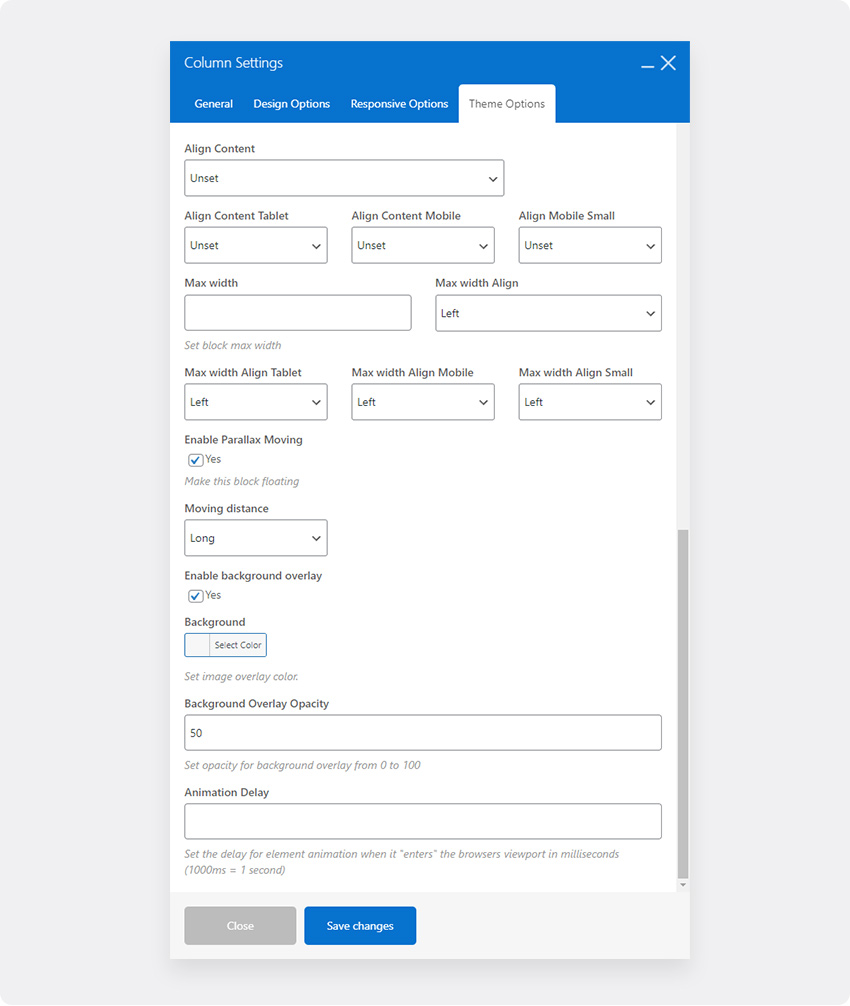
Max Width – while you can choose a columns size using the page builde options, it doesn’t allow to set an exact size. In combination with this option you can set any size to columns. This gives you more flexibility and allows to create new layouts.
Set max width value in px or %.
Use case:
You can limit your content width on desktop and keep it max width on mobile using a single option without the need to setup column setting for each screen size which can be pretty time consuming.
Parallax Moving – if you enable parallax option for column it will be floating when the page is scrolled creating a facny effect.
You can choose how much it will be moved on scroll by setting “Moving Distance” option.
Background Overlay – You can add additional color layer on background of column which will overlay the background image.
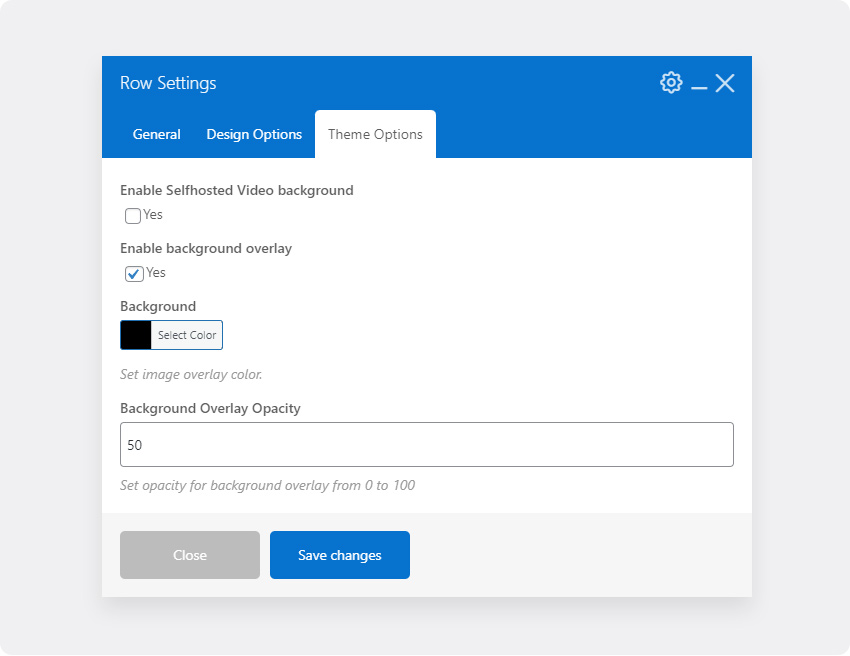
Row Theme Options
To open row settings click on the pencil icon on the top right corner of a row block.
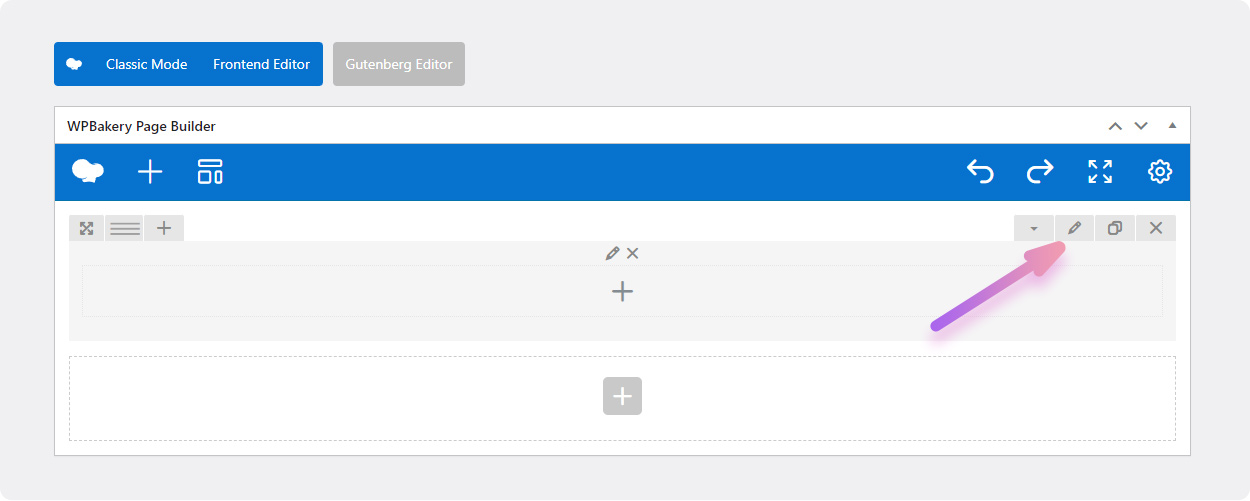
You can add a youtube video as a background to Rows using a page builder default otpions in General tab. We’ve also added possibility to add a selfhosted video using “Enable SelfHosted Video Backgound” option. Check to enable it and paste urls to your video.
Row also comes with background overlay color option. It is the same as in column but gives you possibility to cover the whole area when you set row to full width without paddings.
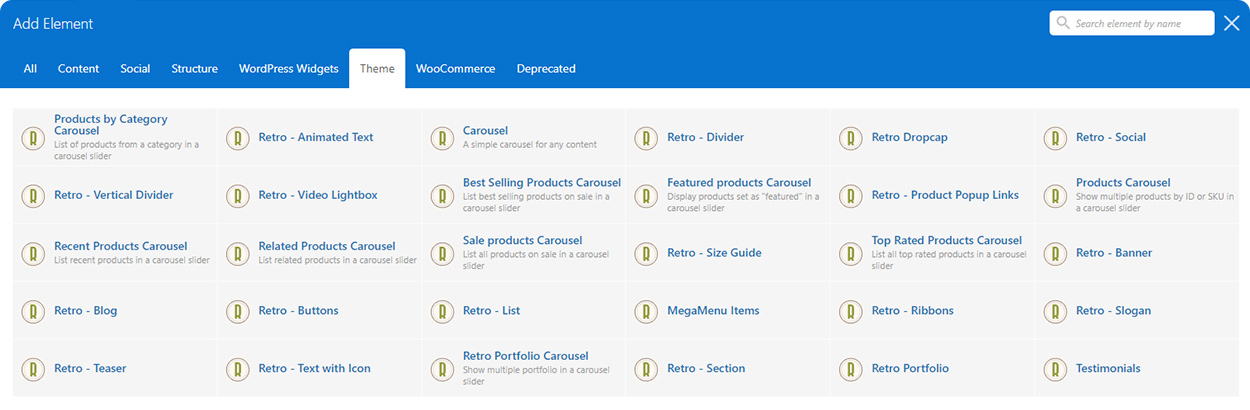
Theme Elements (Shortcodes)
Retro WordPress theme comes with a set of custom made shortcodes in addition to the WPbakery Page Builder default shortcodes.
You can find Retro shortcode in Theme tab when adding a new page element.
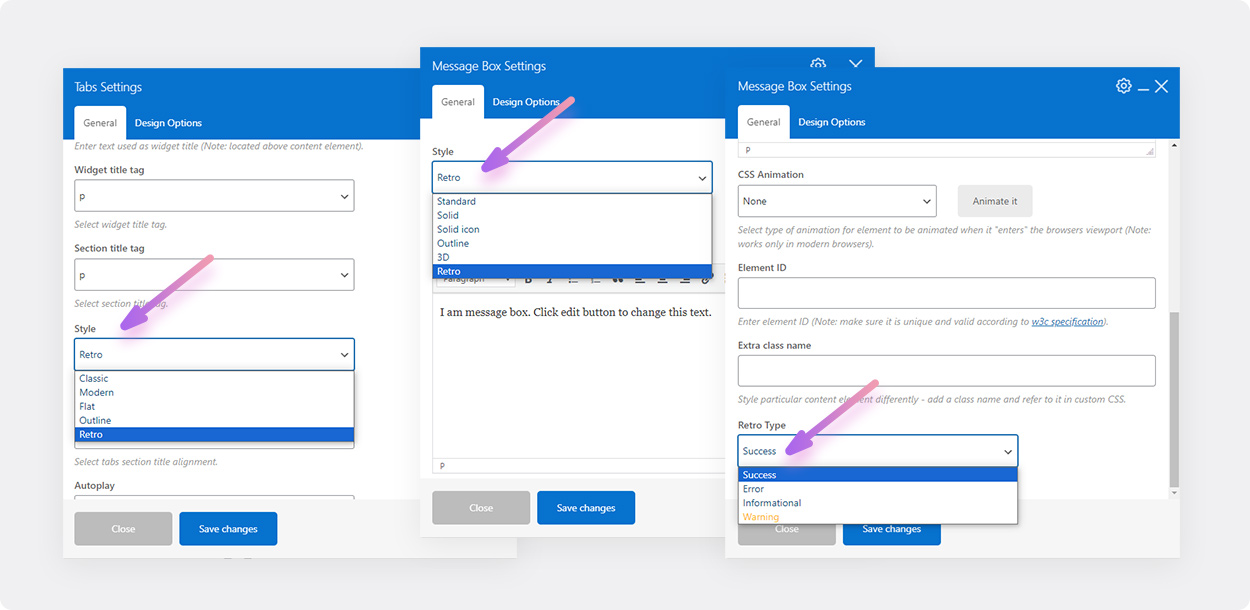
Default shortcode with Retro style
Some of the default Page builder shortcodes also has been extended in order to add Retro theme style.
You can find “Retro” style option in following shortcodes: Message Box, Tabs, Toggles, FAQ, Acordion.
How to add a frame to an Image
To add border to an image simply add a class “imgborder” to it.
If you added image using a page builder element(shortcode) then you can add a custom class to “Extra class name” field.

You can aldo add “imgborder-view” class to add a border with a “view” text at the bottom.
You can check example of an image with both classes below.
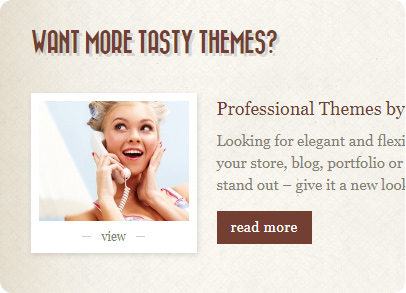
“imgborder-view” class

“imgborder” class
Mini shortcodes
[site-name] - show site name which is set in Settings.[the-year] - shows current year.[footer-menu] - shows menu which is assigned to footer.[empty-space height="30px"] - in case you need to add spacing in a content without a page builder.Legacy shortcodes
Retro 5 theme have some of the shortcodes from Retro 4 theme to make migration process a bit easier. But we suggest to replace theme with new versions. New shortcodes also have more options.
Below is a list of a legacy shortcodes from Retro 4.
Column shortcodes, use page builder columns insted:
[one_half]...[/one_half]
[one_third]...[/one_third]
[one_fourth]...[/one_fourth]
[two_third]...[/two_third]
[three_fourth]...[/three_fourth]
Tabs, buttons, notifications. Use page builder elements instead:
[tabgroup][tab]...[/tab][/tabgroup]
[button]...[/button]
[notification]...[/notification]
Optional
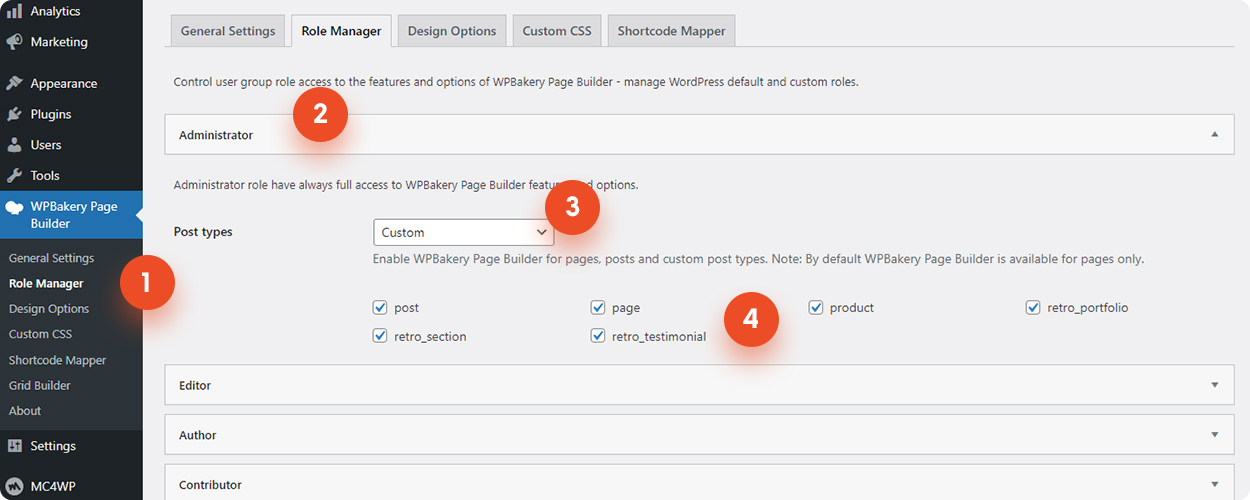
Enable page builder for all post types
By default page builder is enabled for pages only. So before we can use it for posts, products, portfolio and other post types, we need to enable it for these post types. Retro theme installation wizard enabling all post types. In case some of the post types wasn’t enabled, you can follow instruction below to enable them:
To do this go to WPBakery Page Builder / Role Manager (1)
Expand “Administrator” section (2)
Choose “Custom” for “Post types” (3) options
and mark all of the posts type checkboxes (4) as shown on image below.
Install WPBakery Page Builder plugin manually
- Go to Plugins -> Add New in WordPress admin panel
- Click “Upload Plugin” button at the top of the page
- Extract archive with the bundled plugins that you downloaded from My Account / Downloads section of olegnax.com website. This archive contains multiple plugins.
- Choose js_compoers.zip and click “Install Now” button
- Wait while plugin is uploaded to your server
- Click “Activate Plugin” button
If you installed it manually then you will have to also manually enable it for post types

