


Footer consist of 3 areas:
Main (Widgets) Footer area (1), Copyright Area (2) and Footer Logo Area (3).
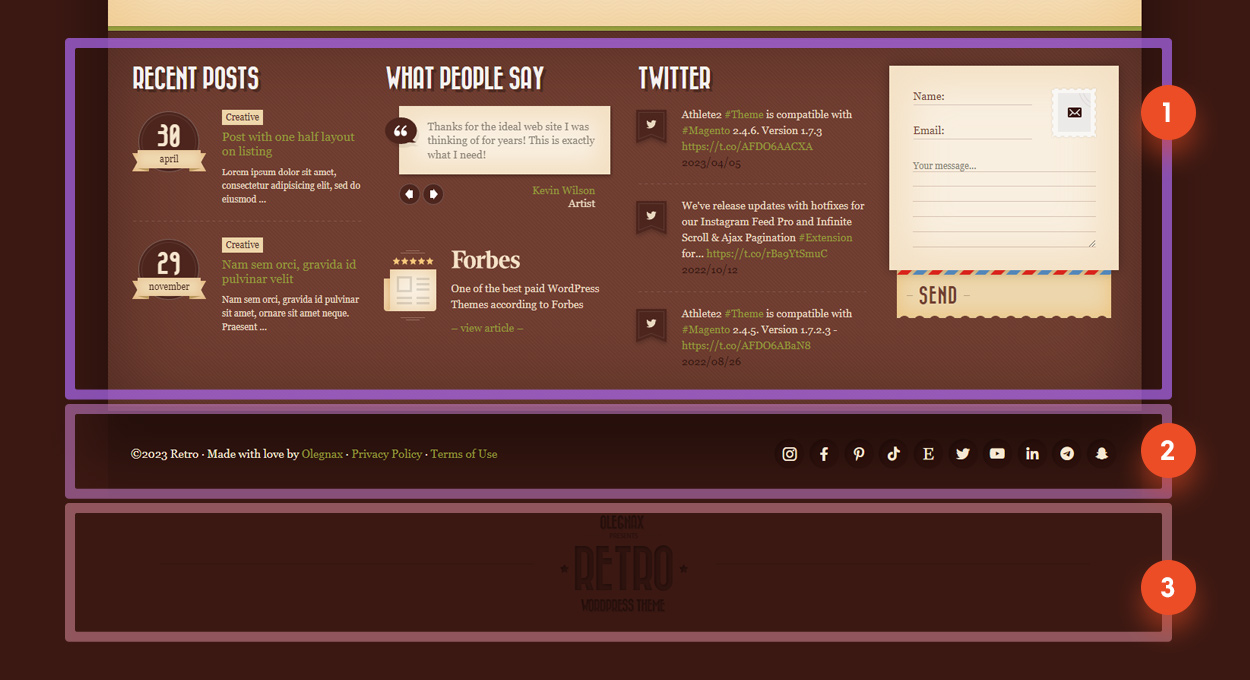
You can find settings for each of these areas in Retro / Footer.
Footer Widget Area – this option enables a main footer content area (1) which is based on widgets. See Custom Widget Area section to learn how to add widgets.
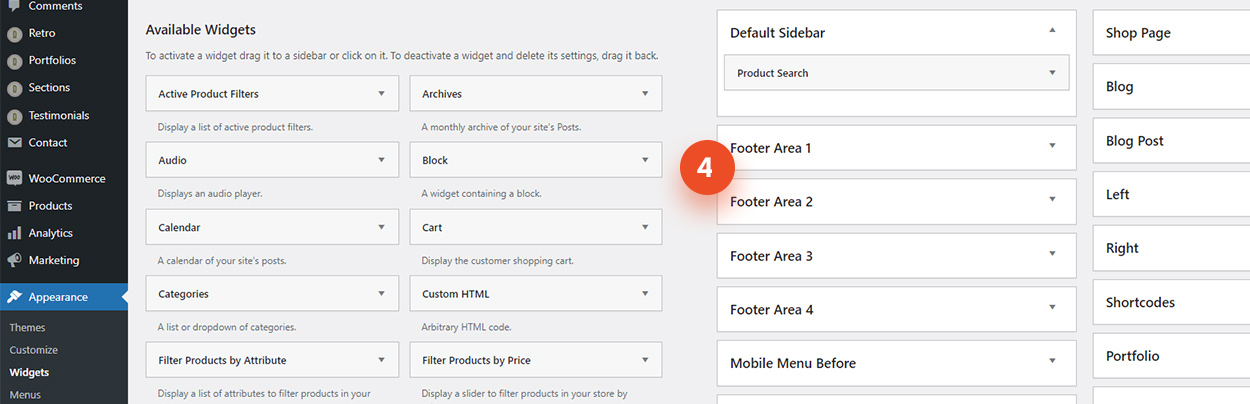
In case with footer you need to add widgets to widgets areas (Appearance / Widgets) called “Footer Area 1” – “Footer Area 4”. (4). Each footer area corresponds to a column in footer.
Now you need to add widgets to your widget area. Simply drag desired widgets from the left side where it says “Available Widgets” to the widget area on the right side.
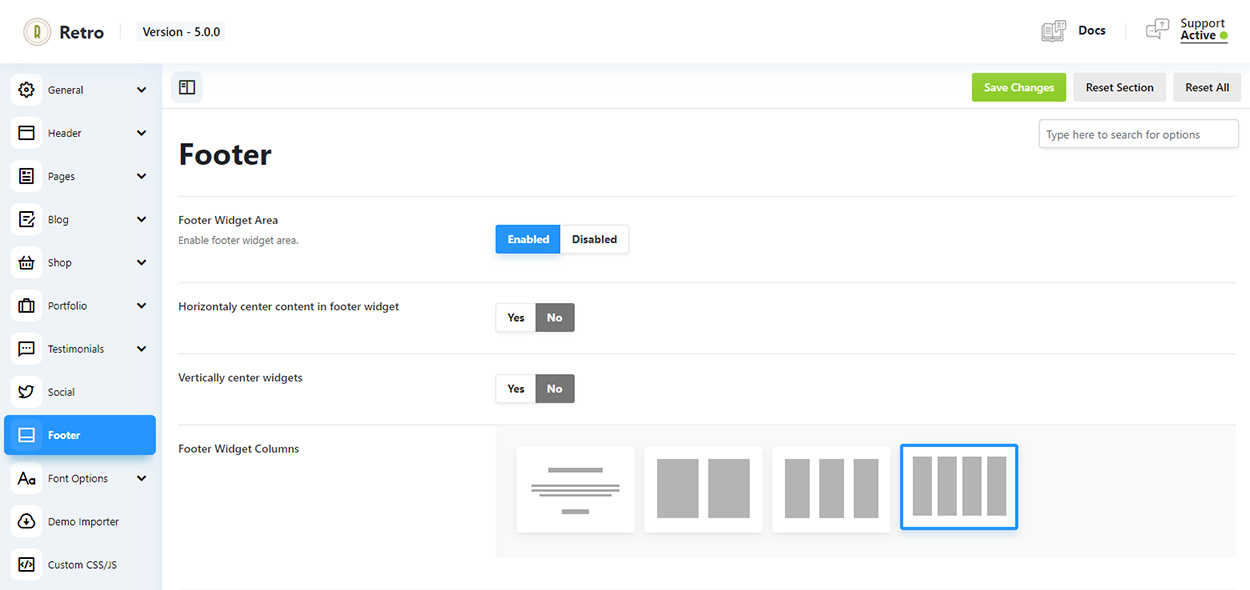
Footer Widget Columns – this option allows you to choose how many column will be in the main footer area. The more columns in layout the more widget areas will be create in Appearance / Widgets.
If you for example set 3 columns then only footer widget areas 1 to 3 will be active (4) and footer area 4 will be deactivated.
Vertical and Horizontal center widgets options allows you to change alignment for the footer columns content.
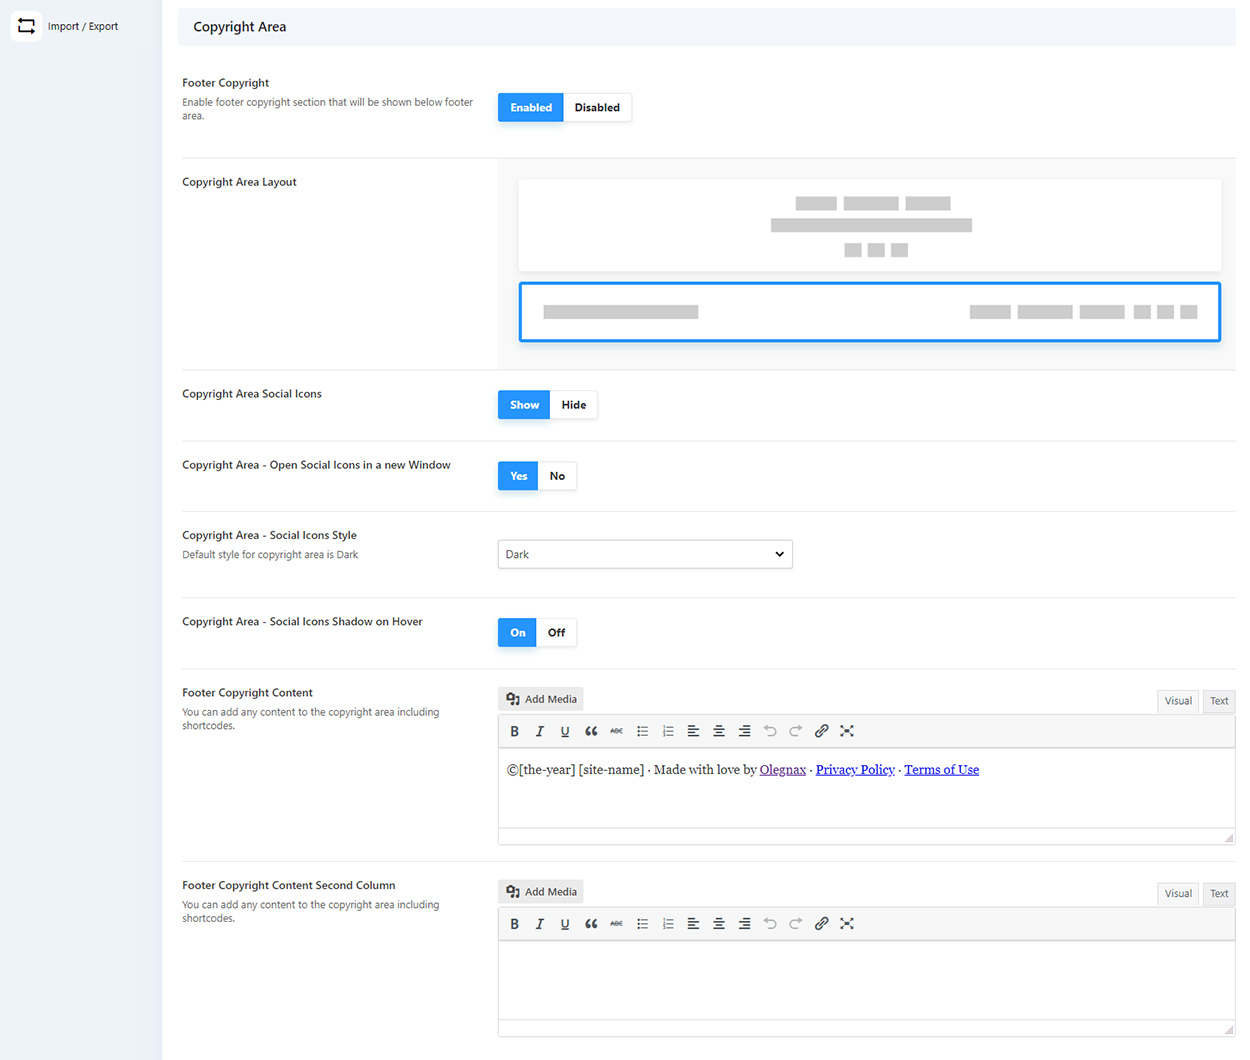
Copyright area.
You can choose between two different copyright area layouts, enable to show social icons in copyright content and add any additional content to copyright area.
First layout is a one column layout. All of the content (menu, social icons, etc.) will one below another.
Second layout is a two columns layout, where menu and social icons are placed on the right, when custom content area is on the left. There is also a custom content area for the right column – “Footer Copyright Content Second Column”.
Menu for footer can be assigned in Appearance / Menus.
Create a new menu (or choose an existing) and set “Display location” as ”Footer Menu” for it.
Footer logo area
This area was made to show an image at the very bottom of the website (3) but now you can also add any content to it. Enable Footer Logo Area – Custom Content to activate a textarea. Content will appear below the footer logo image.

