Contact form functionality is provided by Contact Form 7 plugin which is automatiaclly installed by the theme installation wizard.
How to create a form
To create a form click Contact / Add new in the WordPress sidebar.
You will start with a sample template like on image below. If you wish to have the form with the same style as on our demo, then you need to edit this content as described below.
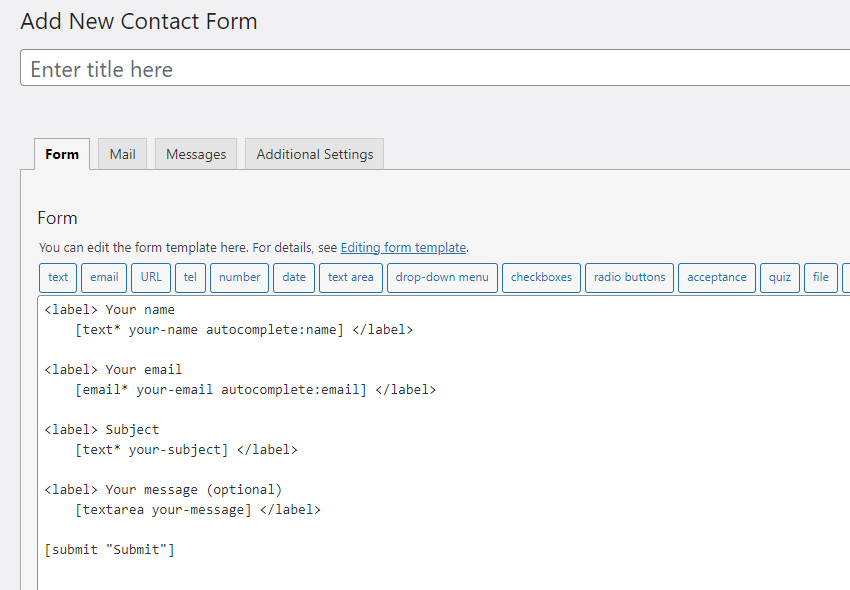
Contact form Content example
To make contact form with the same styles as on contact page you need to wrap each line in a div with a “form_line” class as following:
Before:
<label> Website:</label>[url website]
After:
<div class="form_line"><label> Website:</label>[url website]</div>
Also wrap the entire content of the form in a div with class “retro-lines”:
<div class="retro-lines">
... form content here ...
</div>
Below you can see a complete example of a form used in our demo:
<div class="retro-lines clearfix">
<div class="form_line">
<label>Name:</label>[text* your-name]
</div>
<div class="form_line">
<label>Email:</label>[email* your-email]
</div>
<div class="form_line"><label> Website:</label>[url website]
</div>
<div class="form_line">
[textarea your-message]
</div>
<div class="lines-btn">
[submit "Send"]</div>
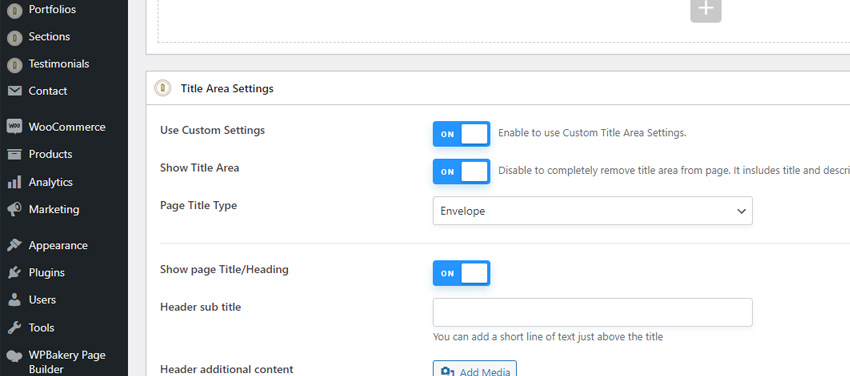
</div>How to add an Envelope style to a page.
When you are editing a page, scroll down until you see a “Title Area Settings” metabox.
In this block enable “Use Custom Settings” and choose “Enveloper” for “Page Titlte Type” option.
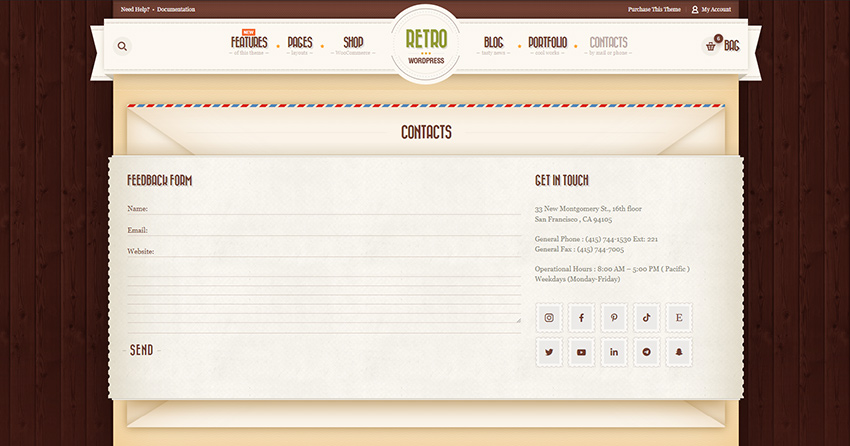
That’s all, click save. After that you will see parts of a huge enveloper in title area and below the content area as on our demo https://retro5.olegnax.com/contacts/
More Contact Form Styles
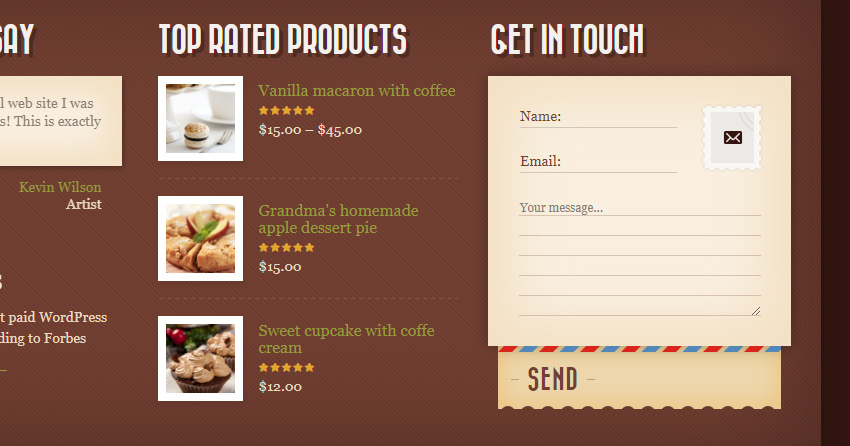
To add a form with an old paper styles and a stamp icon on the right,
use following code:
<div class="retro-lines from-w-stamp letter-style clearfix">
<div class="letter-form-wrap">
<div class="form_line -indent">
<label>Name:</label>[text* your-name]
</div>
<div class="form_line -indent">
<label>Email:</label>[email* your-email]
</div>
<div class="form_textarea">
    [textarea your-message placeholder "Your message..."]
</div>
</div>
<div class="letter-form-bottom">
<div class="lines-btn">[submit "Send"]</div>
</div>
</div>
Another example is a form with an old paper but without a stamp image:
<div class="retro-lines letter-style clearfix">
<div class="letter-form-wrap">
<div class="form_line">
<label>Name:</label>[text* your-name]
</div>
<div class="form_line">
<label>Email:</label>[email* your-email]
</div>
<div class="form_textarea">
    [textarea your-message placeholder "Your message..."]
</div>
</div>
<div class="letter-form-bottom">
<div class="lines-btn">[submit "Send"]</div>
</div>
</div>
How to add contact form to a content
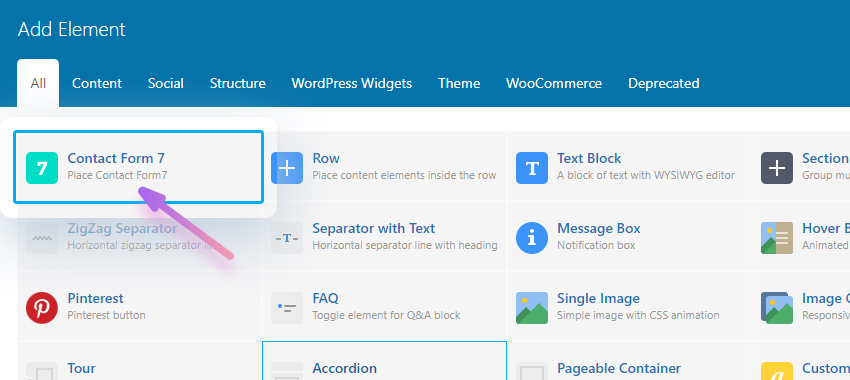
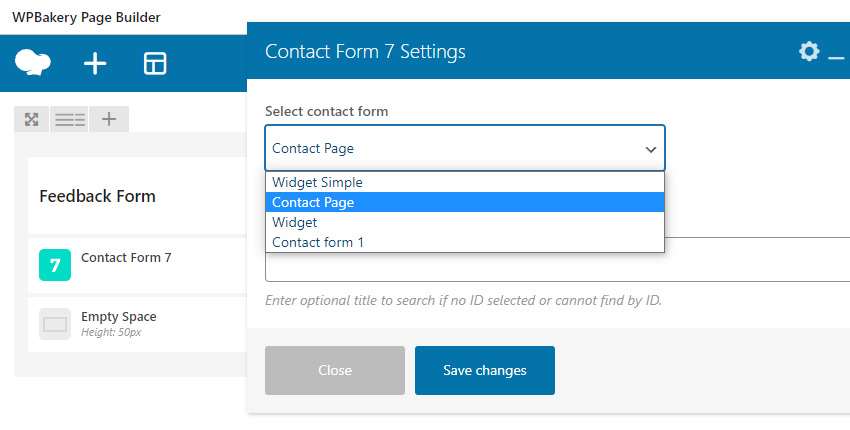
If you are editing a content using a Page builder then you can simply choose to add a “Contact Form 7 ” element. Then choose the form that you wish to show from the list of available forms, which you created before.
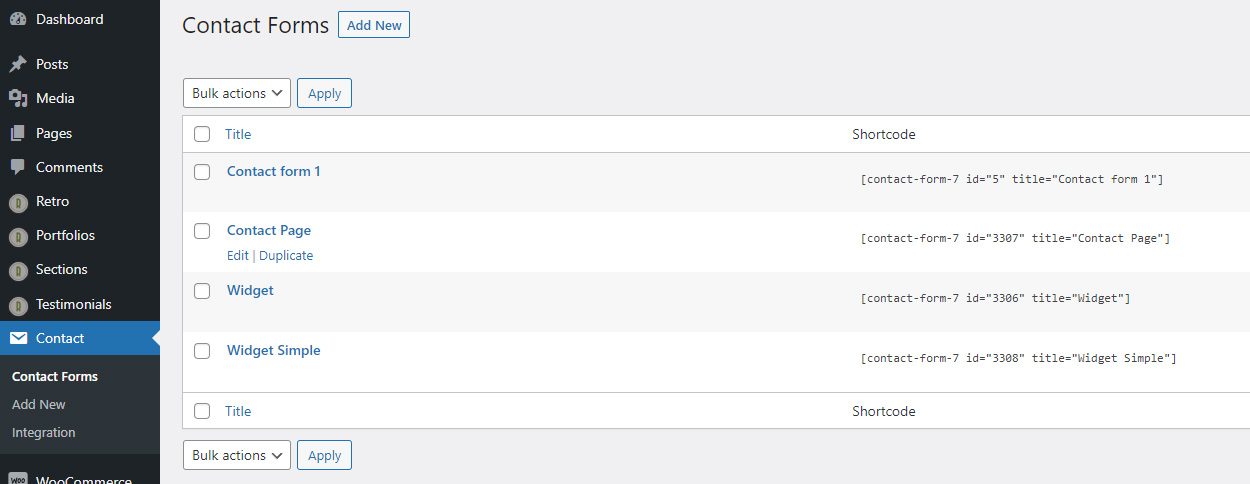
If you want to add it to any other location without a page builder then you can use a shortcode. You can find a shortcode for your forms in Contact / Contact Forms in the Shortcode table column, see image below.
For example:
[contact-form-7 id="3308" title="Widget Simple"]Simply copy and paste it to any textarea.
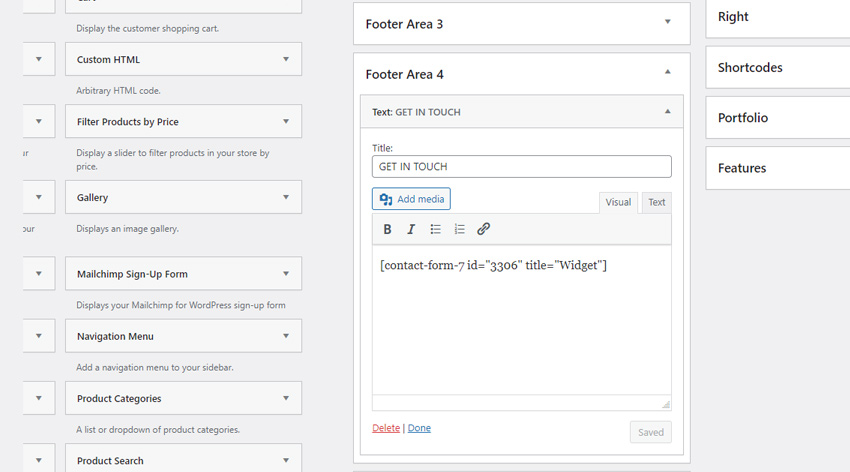
For example to add it in footer, you can add a text widget in Footer Area and then paste a shortcode there. See example on image below.