Installation Information
Module Name: Olegnax_InfiniteScrollPro
Module Path: app/code/Olegnax/InfiniteScrollPro
Check this article to learn how to install Magento 2 extensions.
This extension require Olegnax Core module to be installed. Core module can be installed both Manually and via Composer. Note that Core module is already in package when you download this extension.
Quick installation guide:
- Copy Olegnax Infinite Scroll Pro extension archive to the root of your Magento folder and extract it.
- Set correct files owner and permissions.
- Log in to your server with SSH, navigate to Magento 2 folder and run following commands:
php bin/magento setup:upgrade
php bin/magento setup:di:compile
php bin/magento setup:static-content:deploy
That’s it. Now your extension should be installed and enabled.
Detailed instructions – How to install Magento 2 extensions.
Extension Activation(License)
You need to Activate extension in order to make it work.
First of all you need to get your purchase key:
1. Login to your account on Olegnax website.
2. Navigate to License Keys (1) section in My Acccount. You will see a list of Purchased products.
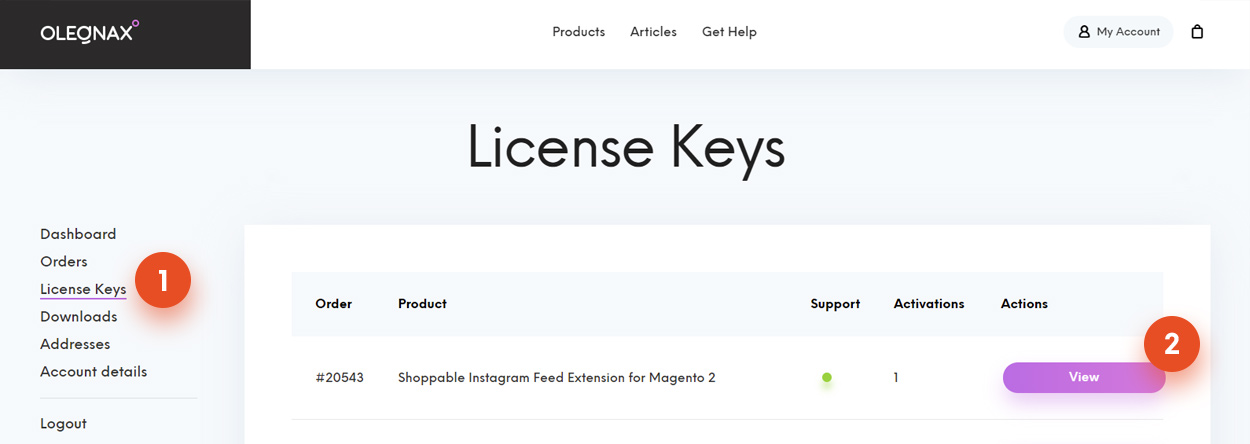
3. Click View (2) button opposite the extension name to view License key page.
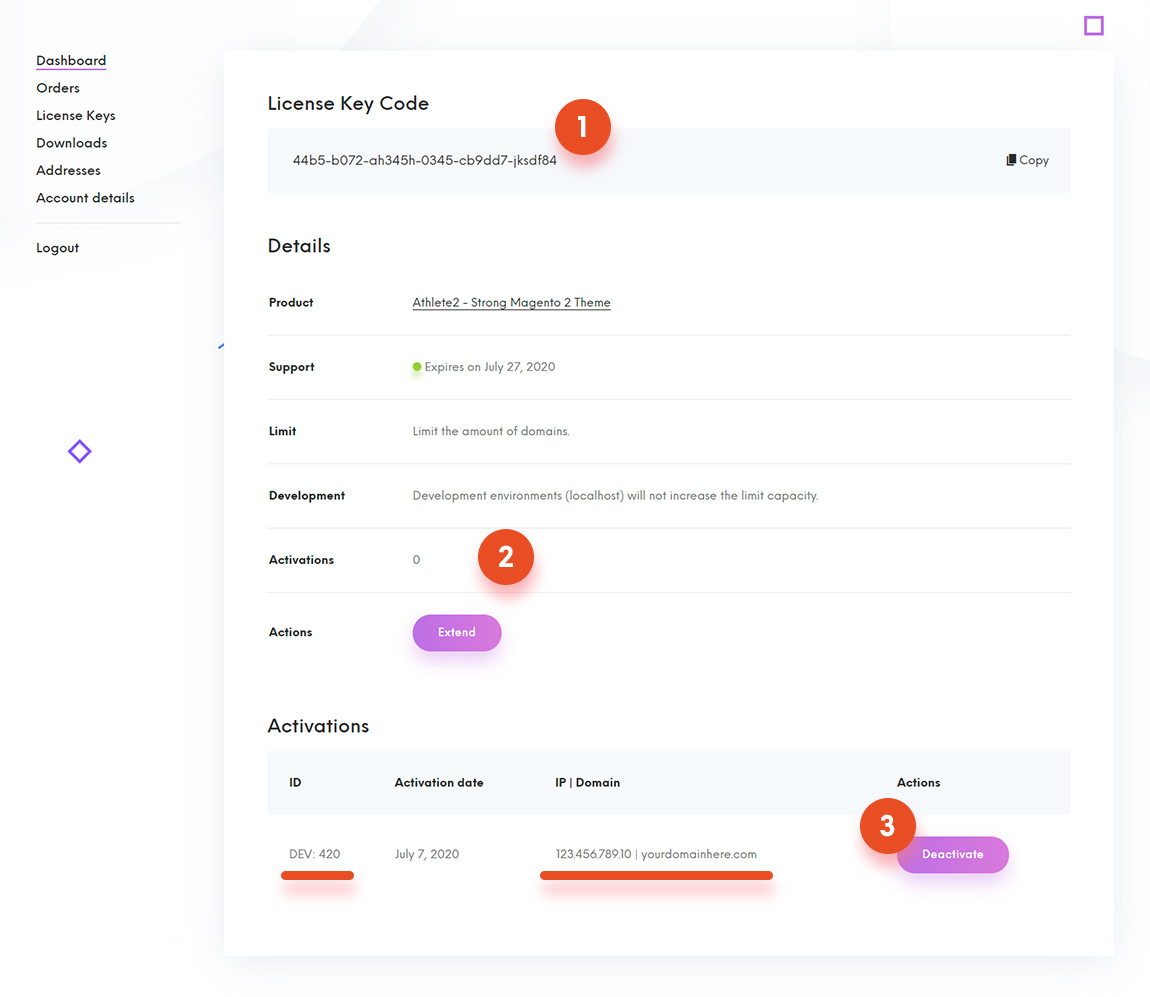
On this page you can View your product purchase code (1), number of currently activated domains (2) and table of Activations (3).
In Activations table you can see domain name and ip where your product key is activated, key type and option to deactivate your registered domains.
You can’t register domains(installations) via Olegnax website, only deregister. Registration should be done via Magento admin panel.
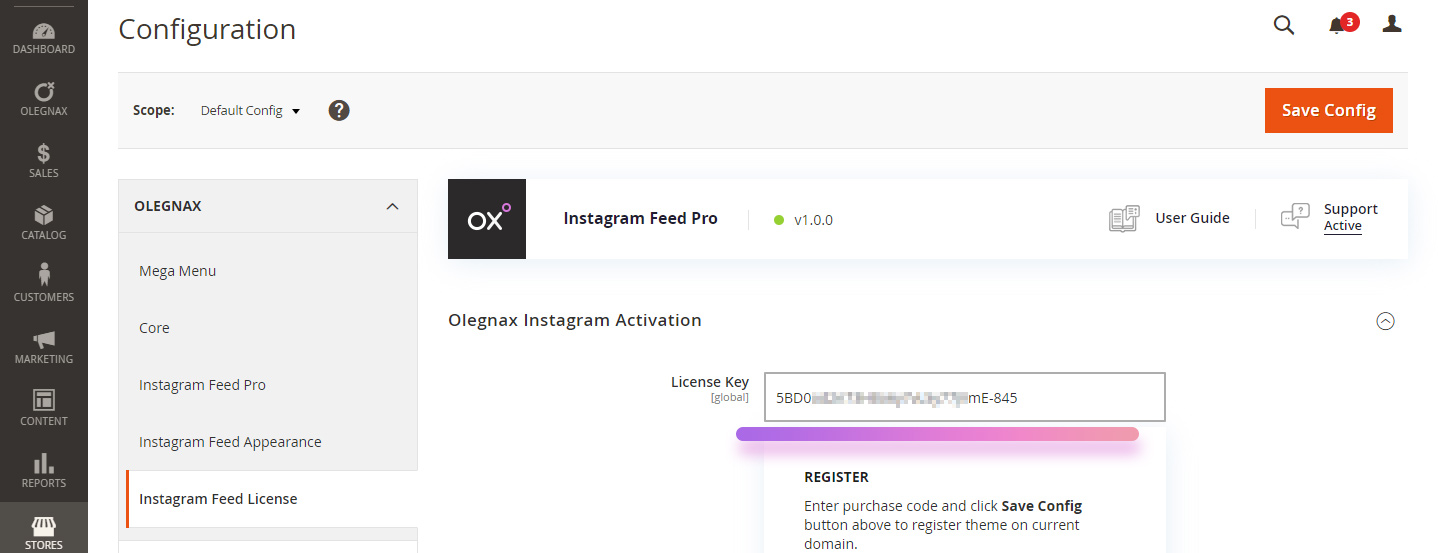
4. Navigate to Olegnax / Infinite Scroll Pro: License in Magento admin panel. Enter your purchase code and click Save Config button. Extension should be activated and fully functional now.
Activation on Dev/Staging site
You have one additional dev activation per Product key. Developer key will not affect the limit of activations.
To use it simply add -dev at the end of your product code, e.g.:
23j01-47gh78-3bdf83-424ma-dev
Extension Settings
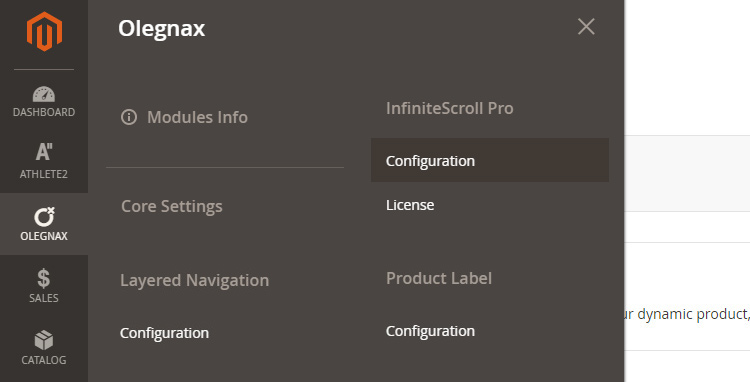
You can find Infinite Scroll & Ajax Pagination Extension for Magento 2 settings in Olegnax menu on the left side in your Magento 2 admin panel: Olegnax > InfiniteScroll Pro > Configuration.
General and Widget Settings
This extension can work with Magento categories, search pages but also with any widget that have Magento pagination. We’ve made two sections with the same settings, so you can have different scroll behavior for catalog pages and widgets. For example you can have products to load automatically on scroll for catalog page but add load more button for widgets.
So, extension settings have two sections:
1. General – main extensions settings, used for catalog and search results.
2. Widget section is for widgets that have pagination.
Settings for both section are generally the same so we will describe them only once.
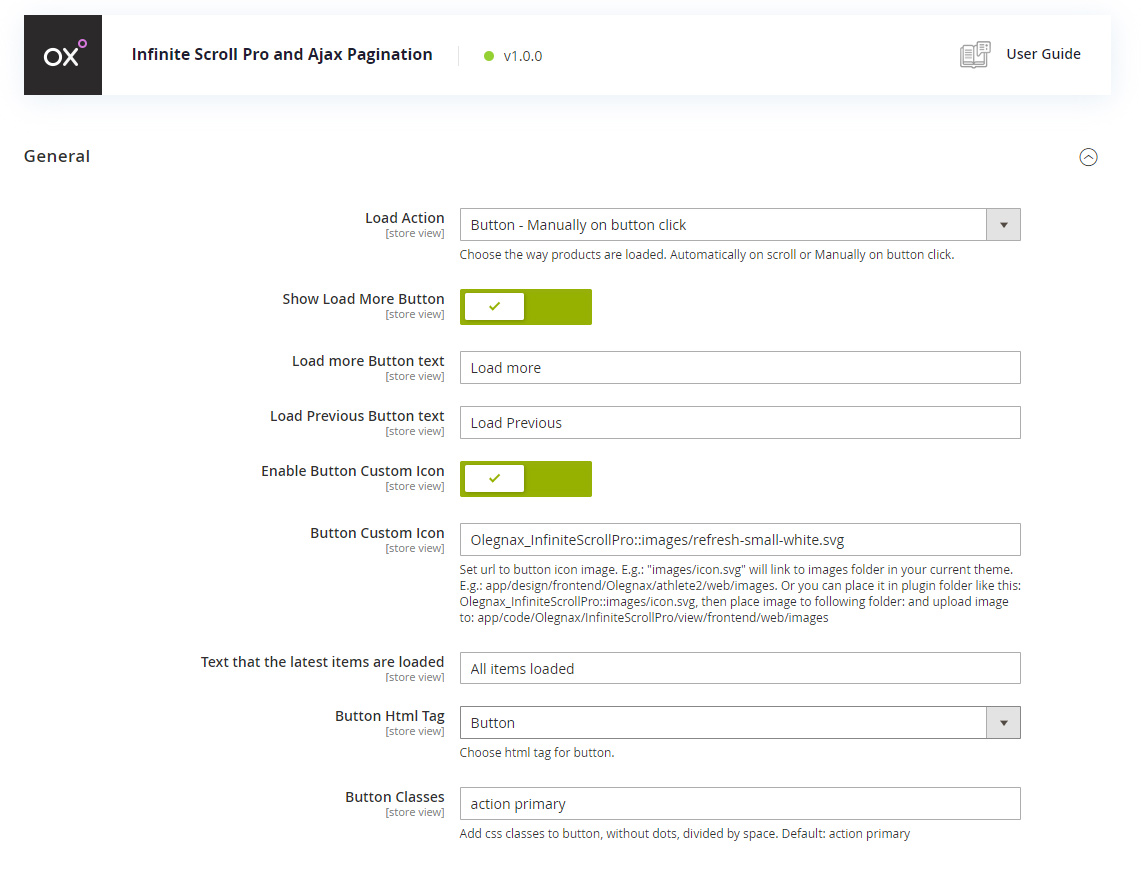
1. Load Action
This option allows you to choose on what action to load next page and also to disable the extension functionality:
- Disable Module – this option is self explanatory. Set “Load action” as “Disable module” to turn off infinite scroll extension functionality and use default pagination.
If you don’t want to use this extension then it is better to uninstall it: How to Uninstall Magento 2 Extension
- On scroll – in this case pages will be loaded automatically when you scroll down.
- Button – Manually on button click – this option will add “Load more” button to default pagination. Click on this button to load next page without reloading the page. In this mode you can choose to show load more button and ajax pagination either both or only one of them.
2. Load More Button
Show Load more Button – you can disable load more button using this option and show ajax pagination only.
Load more Button text and Load Previous Button text – these options allows to change default text for load more button. First option will set text for button below the products, and second will set change for button that appear above the products. For example if you enter page 3 you will have two buttons one to load pages 1,2 and another to load 4,5,etc. Note that you can set button text in different languages for different store view.
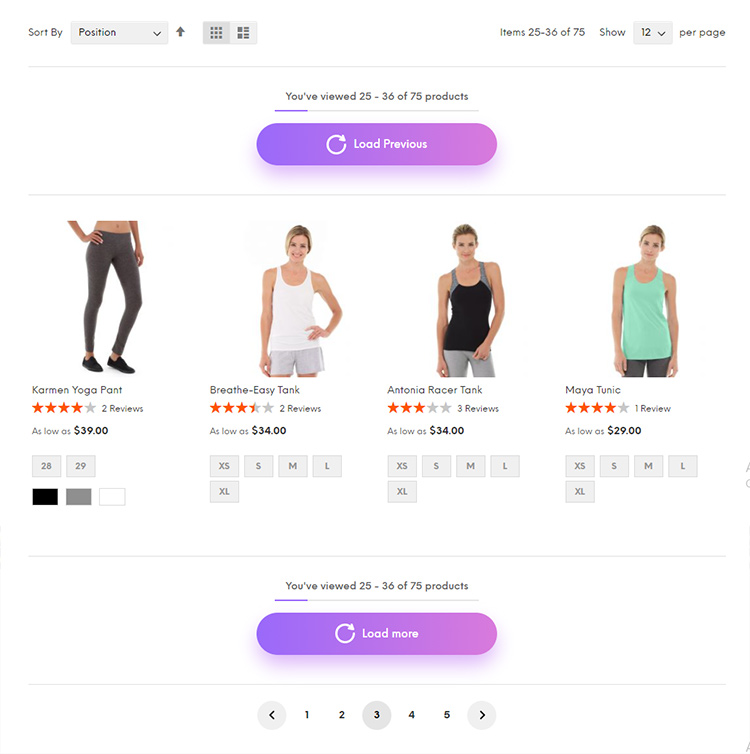
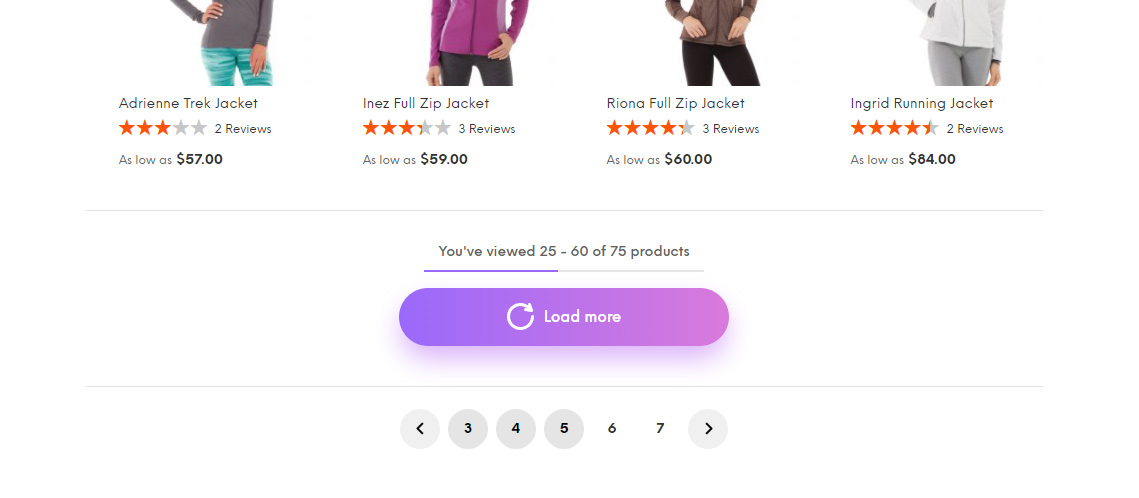
Enable Button Custom Icon and Button Custom Icon – allows you to add any icon(image) inside of the button, including svg. See circle with arrow icon in load more button on image above.
You need to upload your icon(image) manually to your server and set image url in Button Custom Icon field. Default path leads to “web” folder in your current theme. E.g.: “images/icon.svg” will look for icon.svg in images folder of your current theme. E.g.: app/design/frontend/Olegnax/athlete2/web/images.
ou can also place it in plugin folder (app/code/Olegnax/InfiniteScrollPro/view/frontend/web/images) and then add image url path to Button Custom Icon field like this: Olegnax_InfiniteScrollPro::images/icon.svg.
We’ve added couple sample icons in two colors:
Olegnax_InfiniteScrollPro::images/icon.svg
Olegnax_InfiniteScrollPro::images/icon-white.svg
Olegnax_InfiniteScrollPro::images/refresh-small.svg
Olegnax_InfiniteScrollPro::images/refresh-small-white.svg
Button HTML tag and Button Classes – can be useful to fit your theme design. You can choose it to be a link or button to apply appropriate styles from your theme or clear them by choosing div, so theme styles won’t affect this button. Same for Button Classes, default Magento theme uses “action primary” classes for primary button styling, you can remove them to clear styling. Or set classes used in your theme, this will make this button look the same as other button in your theme.
3. Ajax Pagination
You need to choose Button – Manually on button click for Load Action option in order to be able to enable ajax pagination.

Show Pagination – this option will enable and show pagination below the load more button. You can also choose to enable/disable load more button using options described above in order to show both ajax pagination and load more button or only pagination.
Append Adjacent Pages – you can choose classic pagination behavior by disabling this options. In this case when you click on page number current products/page content will be replaced with the selected page content. If you enable this option, products from the next page will be added below the current content (Append). See image below. Pages 3,4 and 5 are selected means content from 3 pages is currently loaded and shown. Note if you choose page 7 on example below, it will still replace content with content from page 7, because it work only for adjacent pages.
4. Ajax Loader
On desktop pages are usually loaded almost instantly so this option is mostly for mobile devices with very slow internet.
This option allows you to choose style for loader which appears below products while next page is loading. You can choose between Magento default loader image, various predefined preloaders, Theme Preloader or upload your custom image.
Morphing Button preloader styles will animate button to became a preloader. Height/width of the morphing preloader will be same as button height/width depenging on preloader style (spinner/line).
You can also adjust colors for predefined preloaders in Appearance section described below.
Custom Image – by default you need to upload image to your theme base folder. images/preloader.svg will link to images folder in your current theme: app\design\frontend\Olegnax\athlete2\web\images.
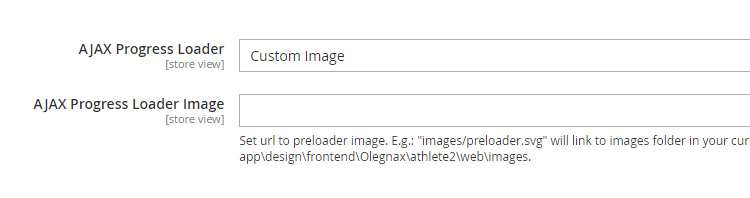
Additionally, you can link to image from other module like this: Olegnax_Scroll::images/ajax-loader.gif. This will look for image in app/code/Olegnax/InfiniteScroll/view/frontend/web/images/ajax-loader.gif
Theme Preloader – there are no styles in extension for Theme Preloader so this option will work only if theme has specific styles. Below example of Athlete2 Theme preloader for Button.
Button ajax loader example from Athlete2 Magento 2 Theme – https://athlete2.com
5. Progress Info
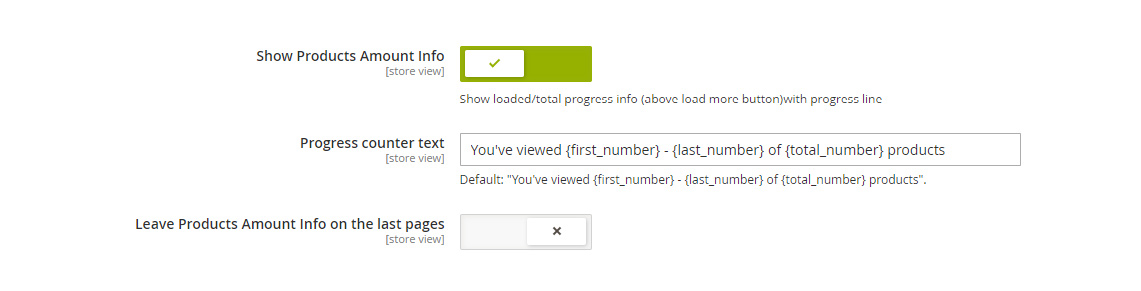
Show Products Amount Info – enable to show progress line with info about loaded and total products. See example on image below.
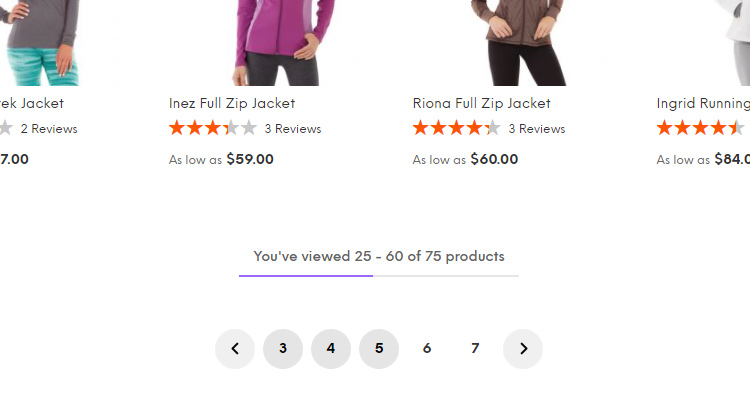
Progress Counter Text – You can change the text shown above the progress line. We’ve made number as variable so you can reorder them: {first_number},{last_number} and {total_number}. Where first and last number are range of currently shown products and total number is a total amount of products in current category.
Default text is: You've viewed {first_number} - {last_number} of {total_number} products
Leave Products Amount Info on the last pages – enable to keep progress line even if all products are loaded.
6. Custom DOM Selectors
You can set your own selectors for products container and product item, in case you have custom html structure in your theme.
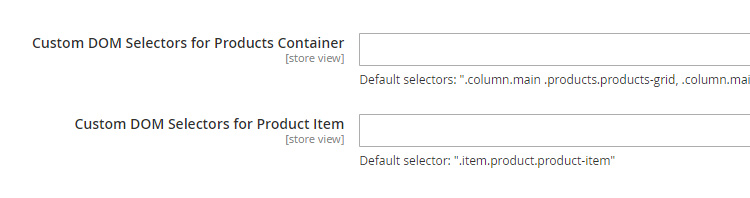
By default following selectors are set for container and item accordingly: .column.main .products.products-grid, .column.main .products.products-list, .column.main .products-grid.grid and .item.product.product-item
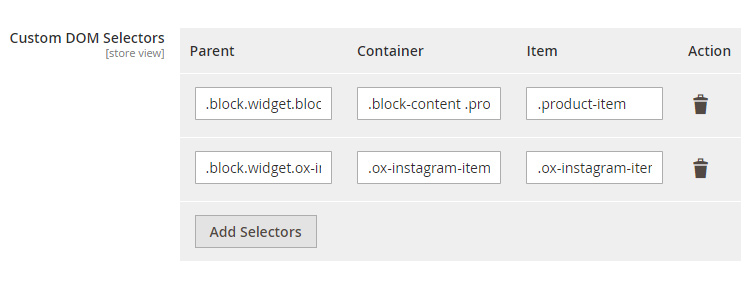
6.1. Custom DOM Selectors in Widget section
In widgets section custom dom selectors option have 3 fields. First is the main wrapper of the widget. Second is the page content container which will be replaced by ajax. Third is a product item container so script can count how many items are on each page and when to stop. You can contact us to consult what selectors to add for your custom theme or extension.
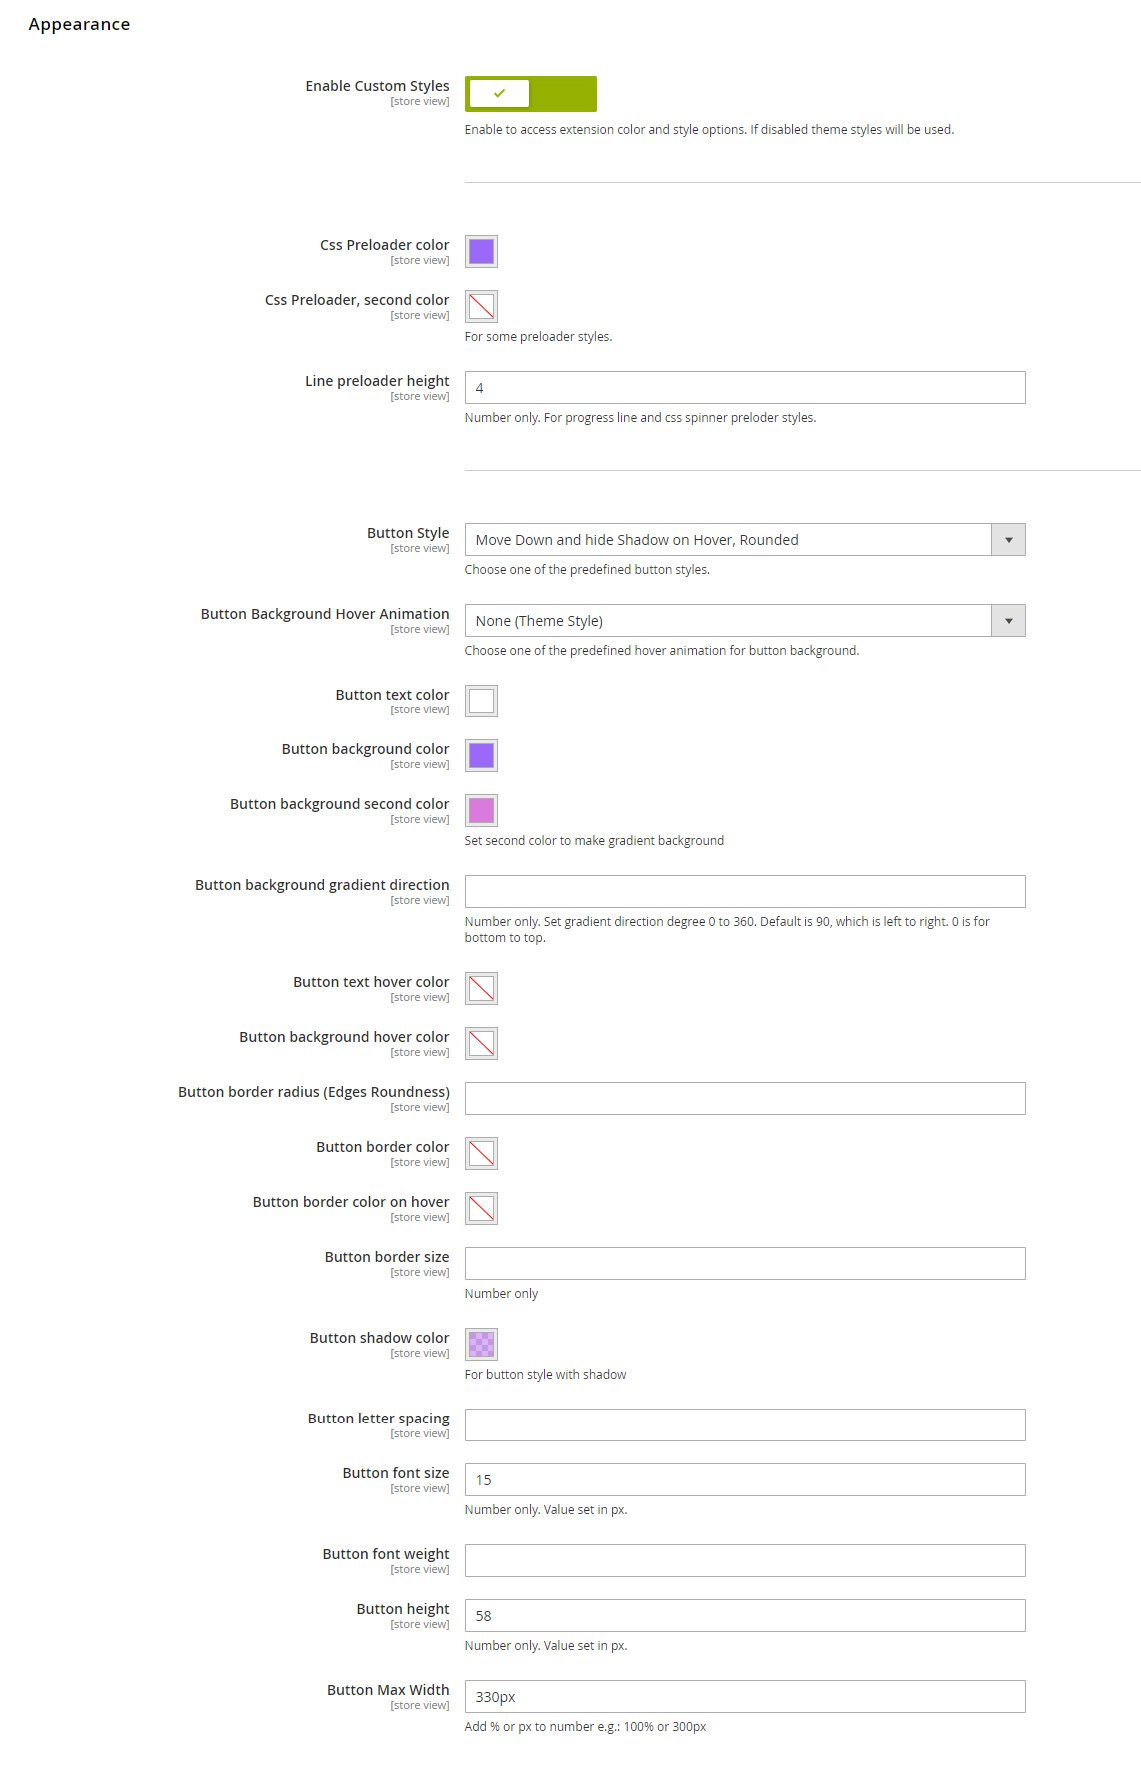
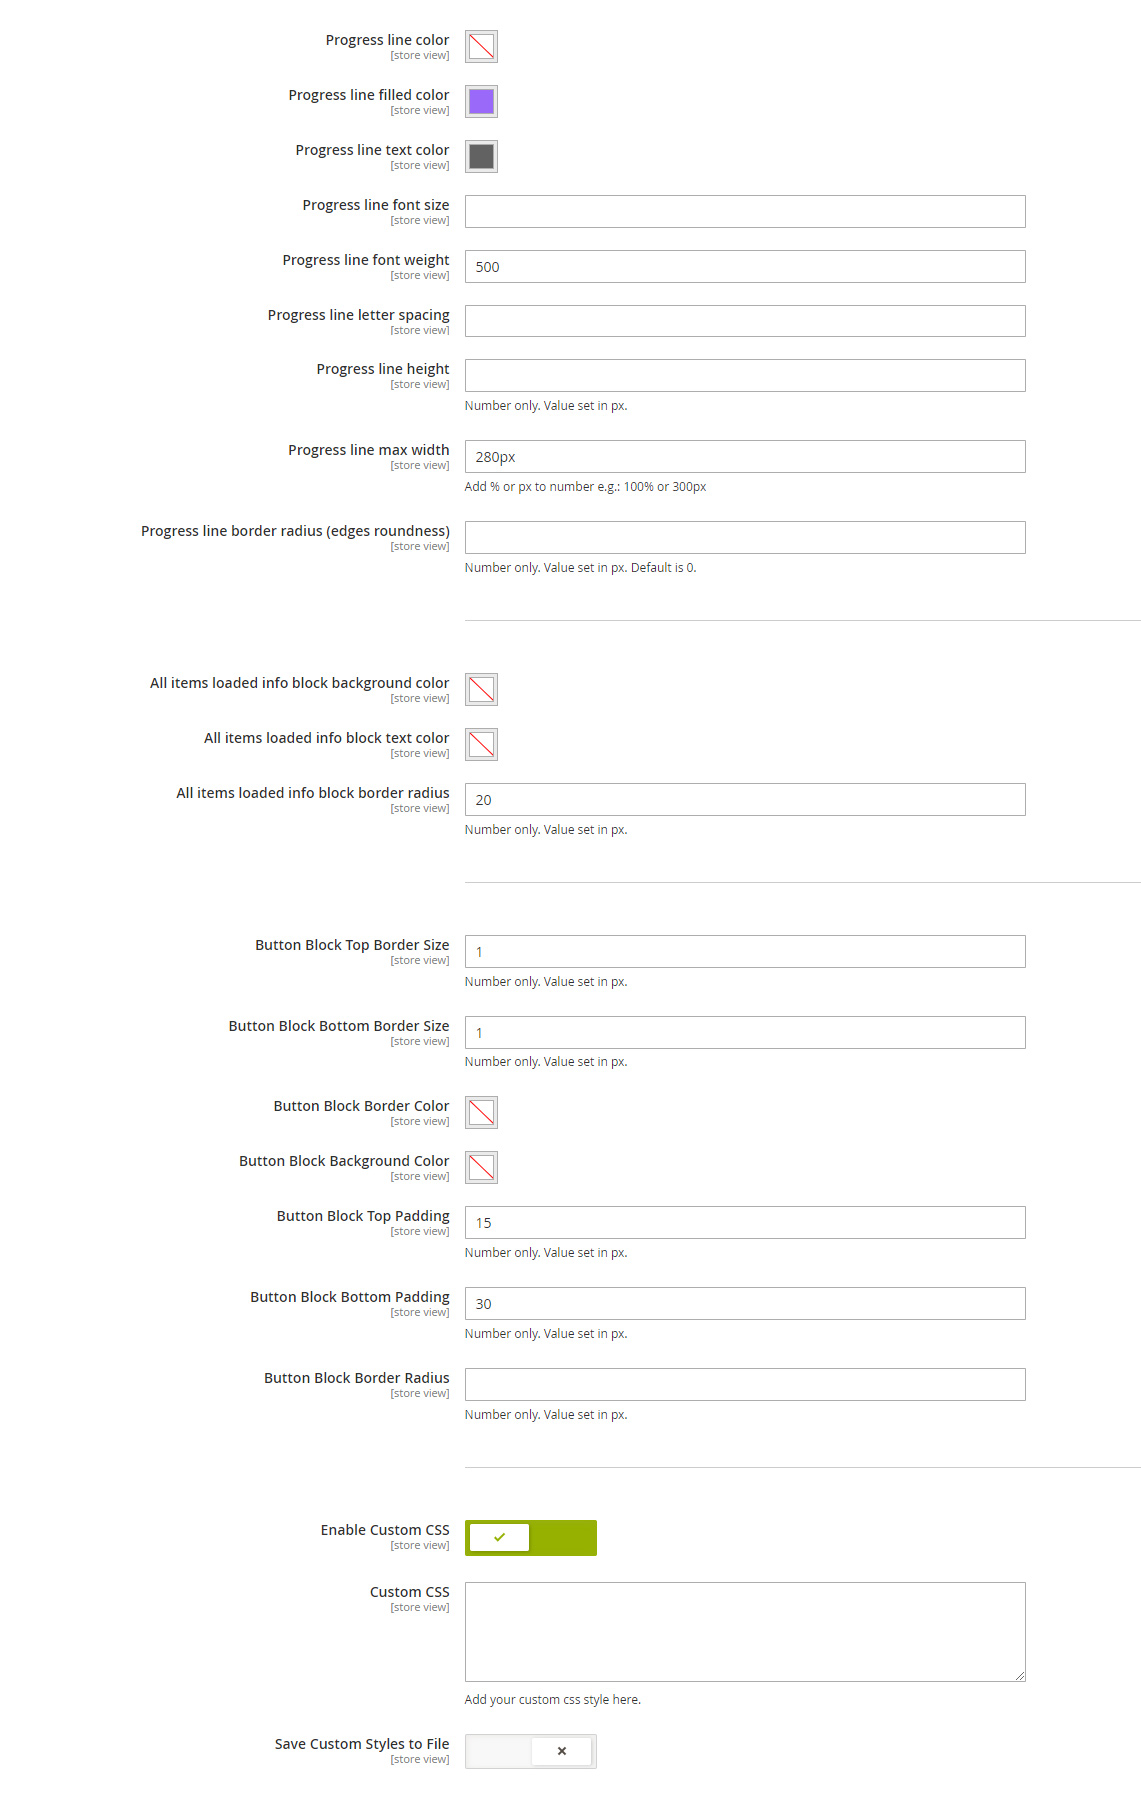
7. Appearance Settings
We’ve added lots of settings to control appearance of the load more button and infinite scroll block.
Enable Custom Styles – this option will enable appearance settings and add extension dynamic css.
By default dynamic css will be added inline, we believe that it is the best option since it is pretty small even if all options used. But you can enable Save Custom Styles to File at the very bottom of the appearance settings and dynamic styles will be added to page as a css file.
You can also add your custom css in case you are missing some appearance options using Custom Css option at the bottom of the appearance settings section.